Thursday, 29 September 2016
Having Fun With Stickers.
Hi everybody! It's my turn to inspire you over on the Stamps and Stencils blog. I've had a great time playing around with paints and inks making my own stickers. If you'd like to see how easy it is to make yourself a pile of lovely colourful stickers, hop over to the Stamps and Stencils blog with this link, and I'll guide you through the process. Ha ha ! who doesn't love a few stickers? x
Monday, 19 September 2016
Twelve Tags of 2016 ~ Technique Remix ~ September
I can hardly believe it. It's not quite the end of September and I've finished my tag for Tim's Twelve Tags Remix Challenge.This month Tim has married together, Distress Patina and Alcohol Ink Resist. Two great techniques. The added twist is that Tim has used Yupo as a background. If you haven't tried this amazing substrate, I suggest you give it a go, it works so well with Alcohol Ink. You can see Tim's fabulous tag here. I particularly like the effect of the Alcohol Ink Resist on my tag, as It looks rather like a vintage film negative. The stamp I've used has lots of fine detail which the Alcohol Resist has picked up really well......
That's it for today folks, short and sweet! See you soon. x
Thursday, 1 September 2016
The Colours of Autumn ~ Stamps and Stencils ~ New Challenge.
'The colours of Autumn'.... just to clarify - the theme is not autumn - just the colours - so you don't have to focus on leaves but of course you can if you want to!!! '
I think you'll agree that this is the perfect challenge for this time of year. If you hop over to the Stamps and Stencils blog, you'll see Rachel's fabulous journal spread, along with some fantastic projects from the rest of the design team. I decided to go 'leafy' with my project and put together this wall hanging, using lot's of Autumnal colours. Whilst mooching in my 'off cuts' draw, I came across some rectangular pieces of mount board about the size of an extra large tag. This was to be my starting point....
I adhered pieces of book pages to the mount board using Matte Mod Podge. Once dry I coated the surface with gesso.
I then applied Dylusion sprays in shades of yellow, orange, brown and green. I also used my new Distress Crayons around the edges and blended them in. This really added depth to the colours. Love these crayons ! Once this was dry, I partially stenciled a flourish into the background, using gesso. The white colour softened as it absorbed some of the Dylusions, giving a barely there look. I then stamped some images of teasels using Archival Inks.I also did a little more stenciling with a Trellis Layering stencil.
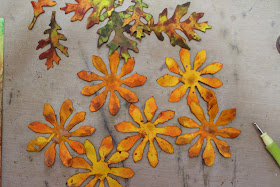
Whilst the various layers were drying, I cut a whole bunch of flowers and leaves, in lightweight manila card, using Tim Holt's Tattered Florals and Tattered Leaves dies. I coloured these on both sides, using a variety of Distress Stains.
Once the flowers were dry, I used a ball tool and a soft mat to mold the flowers into shape.
To form the centres of flowers, I used a forwards and backwards motion along each petal. This gathers the petals inward. I then applied a little glue to the sides of each petal and gently brought them up together. This is a bit fiddly and you have to hold the shape together until the glue starts to dry. It's worth doingthough, as it makes the flower look quite realistic.
I gave the flower a quick squirt of Copper coloured Mica Spray which has added a lovely sheen. The leaves were also coloured with Distress Stains. Once dry, I stamped the surface of each leaf with a crackle patterned stamp.
I also folded the leaves and ran a Mini Distress Ink Pad along the folds, I love doing this kind of 'faux realism'. I then assembled the hanging using Cosmic Shimmer glue to adhere all the different elements. To finish my floral arrangement, I added a bow made with my favourite linen thread. I typed out the quote and added it to the surface and finished the project off with a rusty wire hanger.....
and that, readers, is how I put this project together ! Now if you fancy getting to grips with some gorgeous Autmn Colours, we'd love to see your efforts. Hop over to the Stamps and Stencils blog, where you'll find plenty of inspiration, as well as all the details of how to join in. I look forward to seeing what you come up with.! x


