Hi everybody! Its time for a new challenge over at A Vintage Journey. Sadly this will be the last time I open my blog post with these words, as this will be the final challenge for this amazing blog. It has been an honour and a pleasure to have been a Creative Guide on the AVJ blog and I will miss my fellow CGs as well as all you lovely people! Now, before I get too sad, let me tell you about our fina,l Christmas themed challenge, we are asking that you....
Celebrate the season by making an ATC or a set of ATCS depicting Christmas scenes or colours. Just remember to create your project in one of our preferred styles: vintage, shabby, mixed media, art journaling, industrial, timeworn or steampunk.
I've had a lot of fun creating these ATC's featuring a little shaker element, peeping through a marbled background. This is how I got started......
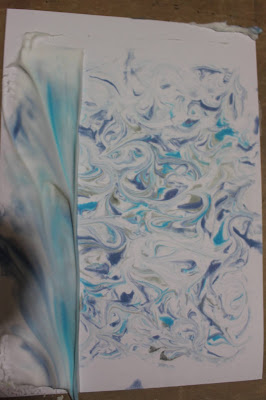
Firstly, I squirted a layer of shaving into a shallow tray and smoothed the surface with a metal squeegee. A large palette knife would also do the trick. Bear in mind that it has to be shaving foam for this technique. Shaving gel will not work.I then unscrewed the tops on several of my Distress Oxide Spays, and used the spray tube to apply drops of the oxide ink onto the surface of the shaving foam.I used the end of a paintbrush to swirl and mingle the colours.I then placed a piece of 300gsm card onto the surface of the shaving foam, lightly pressing it down to ensure that the whole of the surface was in contact with the shaving foam. I then gently peeled it off. at this stage, it looked as though all the swirls had disappeared. The magic really starts to happen when the shaving foam is scraped off the surface....
I used the metal squeegee to remove the shaving foam and reveal the lovely marbled patterns. I made several pieces .......
I used Distress Oxides in Mermaid Lagoon, Iced Spruce and Faded Jeans. Different effects can be achieved by changing the amounts of colour you apply.
The official size for an ATC is 2.5 x 3.5 inches or 64 mm x 89mm. I used an old Tim Holtz Bigz Die to cut out my ATCs and before long I had a nice little pile to play with.
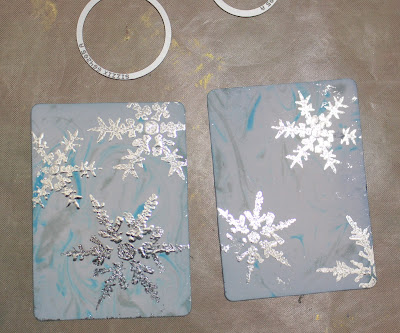
Now, with all this lockdown business, I've found myself spending way too much time with the TV crafting channels on. Obviously, this has lead to my acquiring a few new crafty items,(as if I need any!) One of them, however, is a fairly inexpensive, laminator specifically used for foiling. I have to say, I'm quite taken with it. I used it to apply silver foil to these stenciled snowflakes. In this instance, I stenciled with Collage Medium and left it to dry. I then applied the foil and ran it through the laminator, I rather like the effects, as the collage medium created a bit of texture. A note of caution though, I left some to dry overnight, and tried foiling them the next morning. The Collage Medium did not take up the foil quite as well as when it was left for a shorter time.
I used the circle die that came with the Sizzix Tiny Domes, to cut a circle in my ATC. I then Tim Holtz's Christmas Circle Words to cut out the words, 'hope' and 'Joy', from silver craft card. I also cut an ATC out of Idea-ology Kraft Cardstock in blue. Before I adhered all of the layers, I added some tiny glitter stars to the small dome.
And just like that my final challenge project was finished. We would love you to join us for this last challenge, as usual our top three will be posted to our winners Pinterest Board, on Dec31st. Pease hop over to the AVJ blog where you will find lots of inspiration from the brilliant Creative Guides. We have also all made an extra ATC to say goodbye to all you lovely people who have supported our challenges and enjoyed reading the A Vintage Journey blog, Thank you so much, we will all miss you! I'd also like to thank Brenda and all of the Creative guides for letting me share this fantastic journey! I shall endeavour to keep my Artistic Craft Dabbler going, so I hope to see you over here very soon !


