Friday 9 March 2018

A Vintage Journey ~ Guest Designer Post ~ 'Treasure'

Hi everybody! Today, I'm absolutely delighted to be  making a guest appearance over on the 'A Vintage Journey' blog. Particularly as the team are celebrating their 4th birthday ! The very talented Brenda Brown is hosting their March challenge and she has chosen the theme of Treasure. I have to say that this was music to my ears! These are Brenda's thoughts on the challenge.....
Treasure can be described as wealth or riches we store or accumulate, a collection of valuable, interesting or useful things, bits and pieces we highly value, articles that we hang onto that we’ve bought or found and might never be able to purchase again. What is in your crafty or artsy treasure trove - those items we squirrel away to keep for something special? Maybe some elegant embellishments, that hoard of ephemera or memorabilia found in a junk shop, a tin of old buttons, rusty keys or diamanté jewels, a paper pad you get out and stroke then put away again, some beautiful fabric or lace you can’t bear to part with.......
Like everybody out there, I have amassed a pretty extensive haul of crafty treasures. Some have been bought at considerable expense (but don't tell my DH), some have been gifted and some of my most favourite,are those that have been 'found'. My guest  project features some of these precious, found objects, as well as some of my treasured purchases.

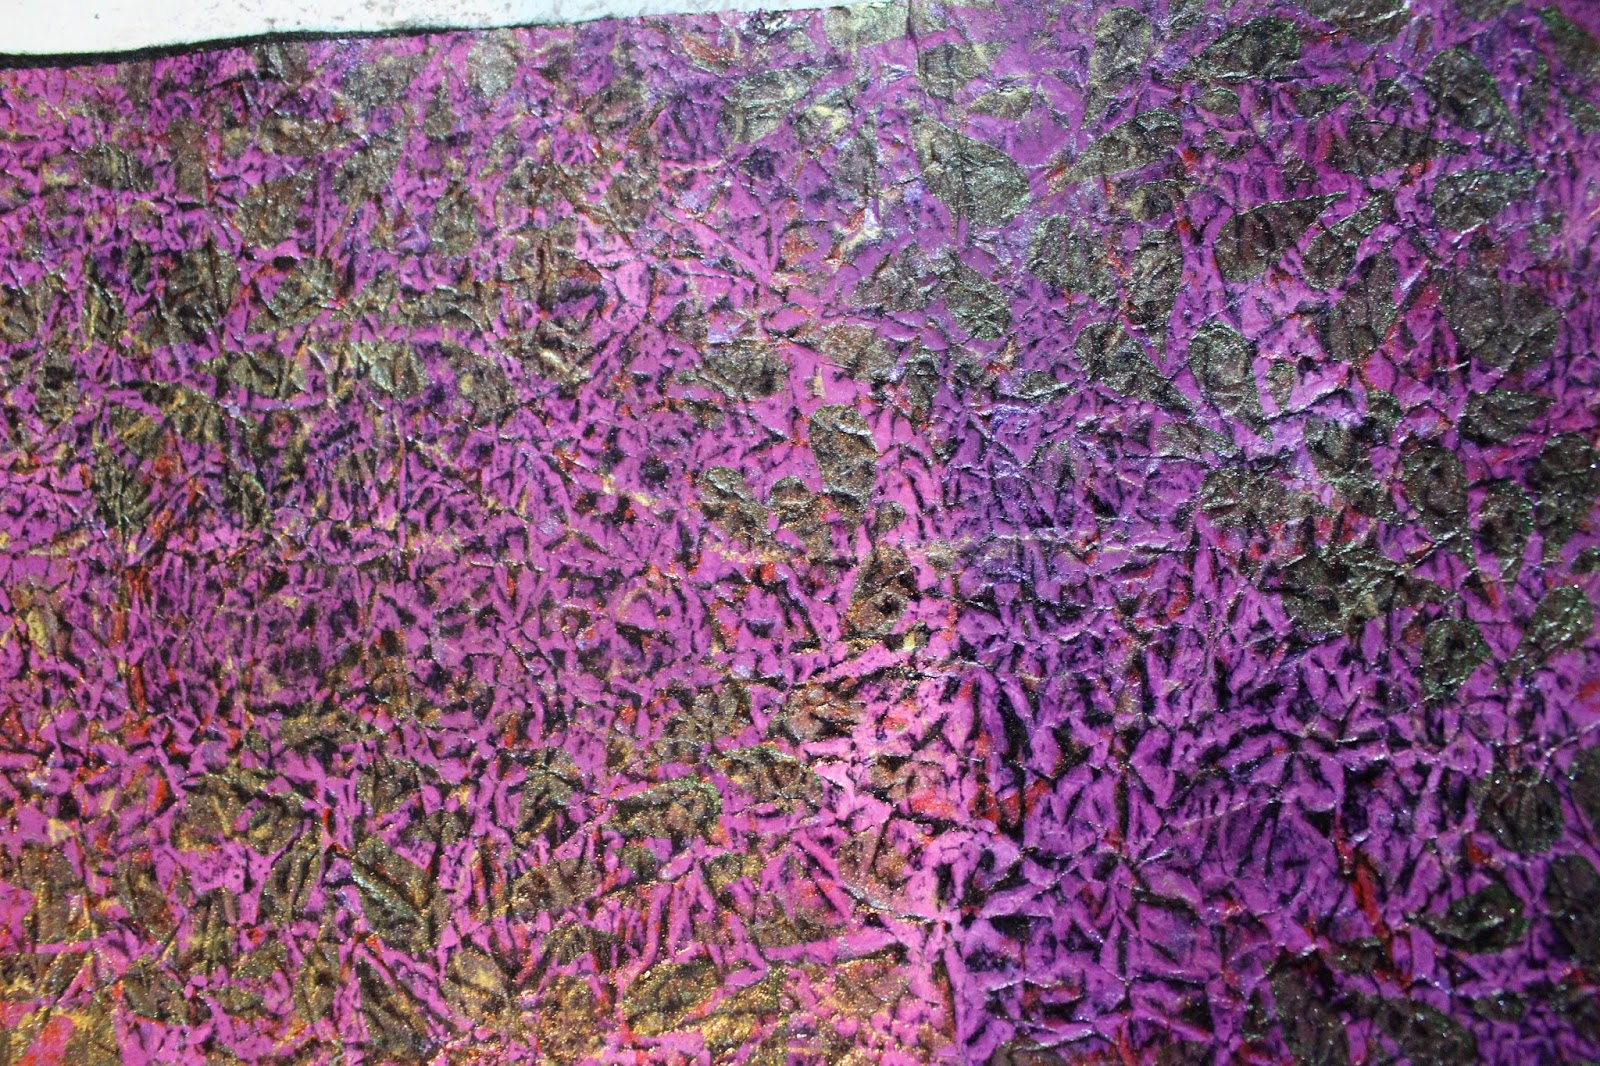
Here's a picture of one of my little 'treasure chests' which houses, pieces of sea glass, rusty springs and general odds and sods. In here, there is flattened piece of tin can, which I spied on the car park of the place I used to work. It was there for some time before I picked it up and squirreled it away. I had to wait until I was leaving work on my own, as I'm sure my colleagues would have thought I was mad picking up bits of 'rubbish'..... I digress... On opening the tin I saw several things I wanted to use. I chose a metal, flying goose brooch, picked up in a charity shop, the bottom of a tin can I'd been rusting in my garden, a piece of green sea glass and a spiral  car spring. Strangely, I felt that these objects, just somehow, belonged together.  Initially I was going to mount them inside a small canvas but when the postman kindly delivered my package of Tim Holtz Vignette boxes I quickly changed my mind. I used the largest box in the set and gave the outside a coat of white gesso, before applying Deco Art Crackle Paste with a palette knife. Once it was dry and the crackles appeared, I applied several light washes of Cobalt Turquoise and Prussian Blue Deco Art Media Fluid Acrylics. I followed this with Andy Skinner's highly recommended, 'dirty wash'. This is basically a wash made with Quinacridone Gold, Panes Grey and a touch of Yellow Iron Oxide. Voila! instant vintaging. Here's a close up......
and here's the Vignette Box......
I cut some strips of paper from one of Mr Holtz's paper stacks, and adhered them to the insides. I used a piece of card for the back panel which I decorated with faux brick work. To achieve this look, I firstly painted the card with Paper Artsy Fresco finish paints, in a mixture of Buff, Terracota and  touch of Mudsplat. These colours are from one of Seth Apter's limited edition ranges. Once dry, I stamped over the surface with a texture stamp using black Archival ink.....
I then used a brick patterned embossing folder and ran the card through my Big Shot, taking care to ensure that the painted surface was uppermost in the card so that the brick pattern came out raised. I then carefully swiped over the surface with a clear Versa Mark Ink Pad and applied some of the new Seth Apter& Emerald Creek, Baked Texture embossing powder in Chunky Rust. After heating the surface, the powder worked it's magic and I was thrilled with the result.......
 I can see why there is so much interest in these new embossing powders! Once the background was finished, it was time to attach my treasures...... 
I tried a couple of different arrangements before deciding that there was really only one way to bring the pieces together. I wrapped some rusty wire around the sea glass and then attached everything, using my 'hot glue pen'. This is a recent acquisition, and seemed to work really well. Before I finally attached the assemblage inside the Vignette Box, I added some decorative elements. 
Firstly, I painted the edges of the box with, Fresco Finish paint in Snow Flake. When it was completely dry, I painted stripes with black gesso. Once this was dry, I applied more 'dirty wash'. Now, because I can't leave anything alone, when it had dried, I decided to make the stripes a bit narrower, so I went on top of the black paint with the Snow Flake, using a slightly thinner brush and followed up with another coat of 'dirty wash'. this toned the white paint down nicely. I wasn't able to get hold of the Tim Holtz Vignette Finial Set, so I improvised with some 'rusty' beads for feet and half of a 'rusted' MDF cog for a topper.
The final touch to my treasure box, was to add, little Dymo embossed title. Well it's been an absolute pleasure being a guest of the A Vintage Journey team. Many thanks to you all. I hope you'll find time to hop over to the AVJ blog, wish them a 'happy birthday' and do a little Treasure hunting of your own ! x


Thursday 8 March 2018

Adventures with "Fabric" Paper.

Hi everybody! It's my turn to inspire you over on the Stamps and Stencils blog today. I've been having fun making 'fabric' from brown paper......
 I even got my sewing machine out and made this little pouch, to show just how amazingly versatile fabric paper can be...........
 If you'd like to know how I did it, make yourself a cuppa and hop over to the Stamps and Stencils blog with this link and you'll  find all the details. It would be lovely to see you there. x  

Thursday 1 March 2018

Wax Lyrical ~ Stamps and Stencils ~ New Challenge.

Hi everybody! It's time for a new challenge over at Stamps and Stencils. Sue is our talented host this month, and she has chosen a great topic, 'Wax Lyrical'. This is what she has to say.......

....... I have long been fascinated with the subject of Encaustic Artmelting wax to create many layers and trapping pieces of fibres and papers between the layers of melted wax just seems magical to me. So for this challenge I want to see some wax on your projects, whether it's just dribbled, melted and then stamped into or a wax embellishment as long as you include some stamping or stencilling the choice is yours !

 I love it when a challenge encourages me to explore something different, and that's exactly what Sue has done with this one. I've been interested in trying 'encaustic' art for a while now, but never seemed to get round to it. Sue's challenge was just the push I needed ! I had an idea of what I wanted to do, but needed to do a bit of research. I googled 'encaustic art and came upon an 'e zine' called Mixed Media Encaustics by Glenda Bailey.  There are some wonderful examples of her work as well as some really useful guidelines. This is how I got started.....
I used a wooden panel, measuring around  6"x 6" and gathered together a selection of papers in fairly neutral colours, to use as my background. I also had some pieces of white tissue to stamp on. I'm lucky enough to have a wax pot which I used to use for batik work.
 Once the beeswax had melted, I used a bristle paintbrush, to brush a layer of wax onto the wooden panel. I then started layering on the different papers, brushing more wax over the surface of each one. Glenda Bailey recommends  "every layer that you put on the collage must be "burned in"or heated and fused in to the layer underneath" . I used my heat tool for this step. Once I had my background all fused together, I applied my stamped tissue focal image, as well as the stamped, motivational words....
I used tissue paper to stamp on but next time I will have a go at stamping onto pieces of Kleenex type tissue as I think it would sink in with very little trace of any edges.
I also added a little Fimo butterfly charm I made sometime ago....
I also sprinkled a few pieces of gold leaf into the melted wax. Once the panel was finished and the wax had set, I gently buffed the surface with a soft cloth. This gives the surface a lovely sheen. The final step was to scrape off the drips of wax from the sides of the panel and paint them with black paint. I'm really quite pleased with the results of  my little dabble with 'encaustic art' and will certainly be having another go! 
Now, our challenge as Sue has said is to use wax somewhere on your project, It doesn't have to be all over and it can be any kind of wax,  such as candles or crayons. If you'd like to have ago, hop over to the Stamps and Stencils blog where you'll find plenty of inspiration from Sue and the rest of the team. We'd love to see your creations! until next time, happy crafting ! x