Hi everybody! The months are racing away and I'm finding it hard to believe that it's August already!
The first day of the month, however, heralds a new challenge from our fabulous
Stamps and Stencils blog. Cec is our talented host and she has chosen a great topic, one that is very close to my heart, Industrial/Grungy. This is what Cec has to say........
Create a mixed media project with some stamping and/or stenciling that puts off a very industrial and grungy vibe - be sure to include lots of metal and texture.
After heeding Cec's words, I've put together this collaged canvas, and great fun it was too !
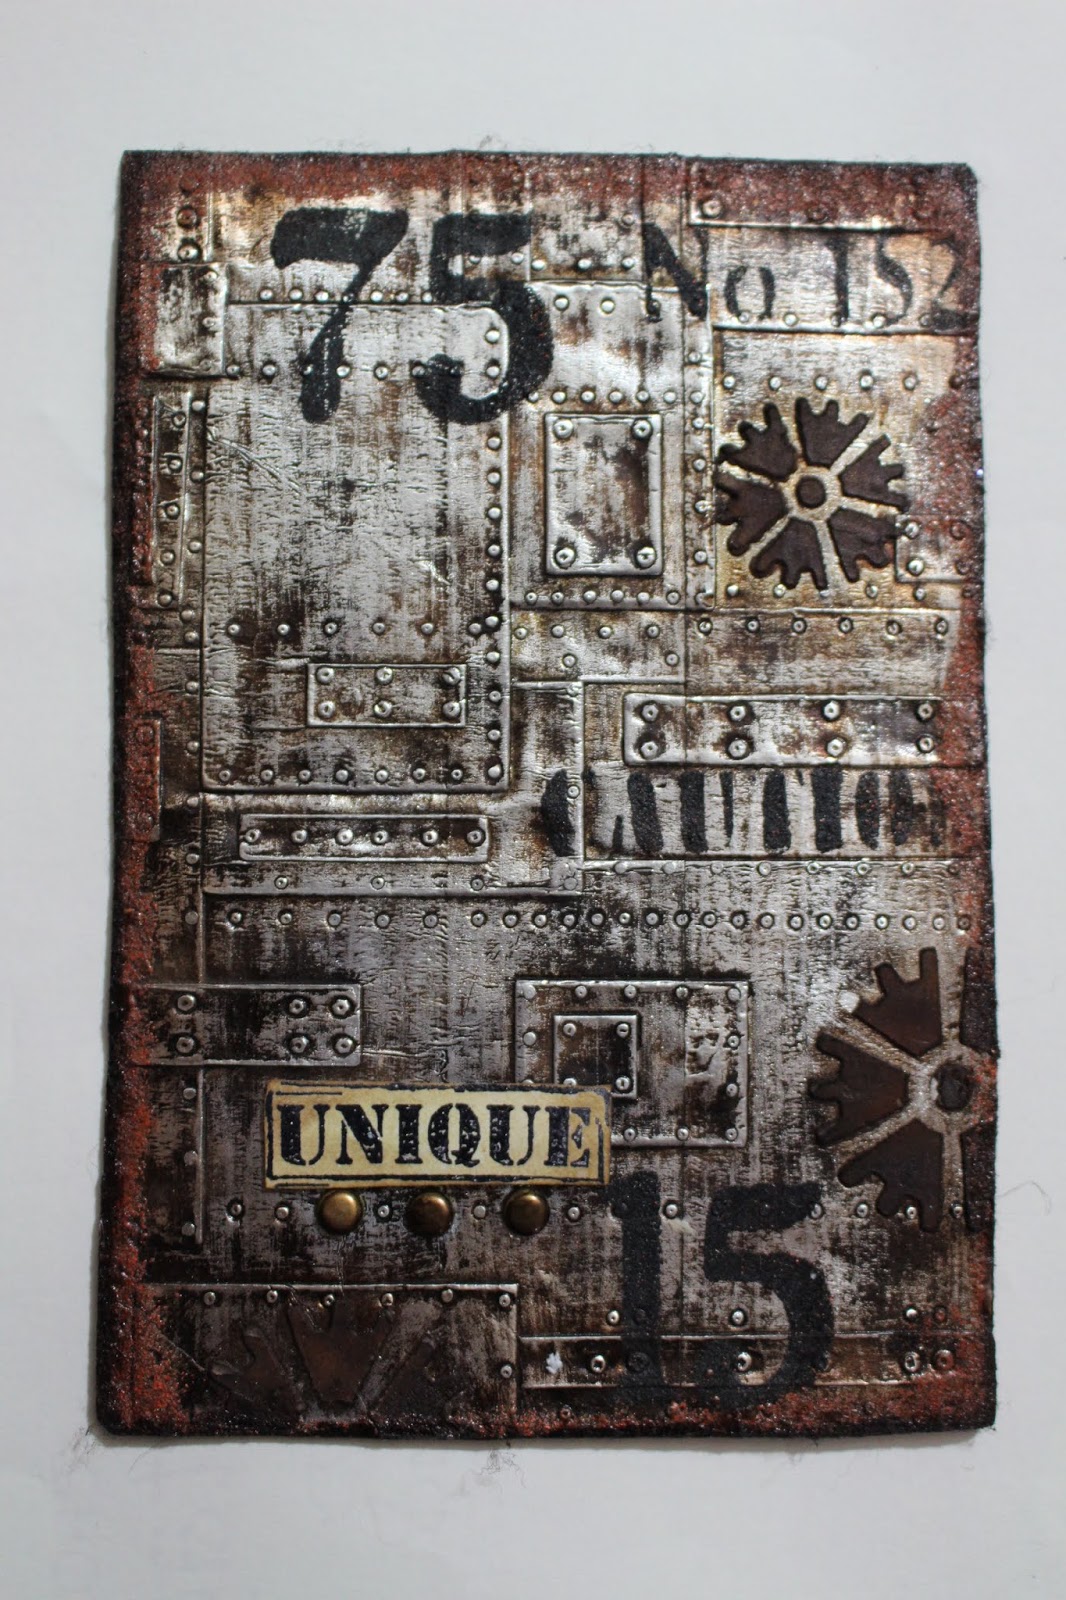
I started off with a piece of recycled card board just a little smaller than my canvas.....
I covered it in sticky backed aluminium tape and ran it through my Big Shot, using one of Tim Holtz's new 3-D Texture Fades. This one is called 'Foundry' and it gave a lovely deep impression . I used Modelling paste and a stencil to add a few cogs ......
and then coloured the surface with alcohol inks........
The next stage was to rub the Alcohol Inks back with a piece of wire wool. This highlights some areas and creates a lot of interest where the ink remains. I then added some more stencilling with black acrylic paint and a little stamped label......
I also added some Chunky Rust, Baked Texture embossing powder to the edges. Once the background had achieved a satisfactory level of industrial grunginess, I turned my attention to the focal image. I covered a piece of craft card with sticky backed aluminium tape and die cut a large butterfly using the Tim Holtz Layered Butterfly die. Instead of using the embossing folder that comes with the die, I decided to use another of the 3-D texture Fades, this one is called Mechanics. I applied Alcohol Inks to the surface and again rubbed some of the colour off, this time, using a piece of fine emery paper.......

I added some wire for the antennae and used more of the Chunky Rust Baked Texture embossing powder on the body. I also shaped the body and the wings by bending them slightly and added a few metal cogs and brads. I prepared the canvas by covering the sides and edges with Tissue wrap. I gave this a 'dirty' wash using Andy Skinner's recipe of Quinacridone Gold, Paynes Grey and a touch of Yellow Iron Oxide.......
Once this was dry, I assembled the canvas and secured the butterfly to the surface with strong dimensional foam tape. A little doodling around the edges and my Industrial Grungy canvas was complete.
It's been a real pleasure creating this project. Many thanks to Cec for a great challenge! If you'd like to get to grips with a little Industrial /Grungy project, then hop over to the
Stamps and Stencils blog with this link, where you'll find all the details of the challenge. You'll also see Cec's beautiful project as well as some gorgeous pieces by the rest of the design team. I think you'll find that there is truly something for everyone. x