Saturday 29 July 2017

Journal Madness !

Hi everybody! I guess I'm like a number of people in the UK, no scotch that, the World, longing to get my hands on Eileen Hull's beautiful Heart Felt Journal Die. Well, I've done the next best thing and got my mitts on a few precious die cuts, courtesy of the very lovely and very talented, Anne Redfern. she makes the most awesome journals. You can see her work over on her blog, Redanne . She has a real beauty on there at the moment, which you can see with this link . The journal I've made, is covered with a piece of Kraftex. If you haven't come across this amazing material before, it's actually a type of 'rugged paper', which looks and feels like leather. It's extremely strong, and takes inks, paints and mediums very well. You can also stamp on it, stencil and sew it and that's exactly what I've done in the making of this journal. I absolutely love it ! I will do a more in depth post about Kraftex at a later date. For now, I'll just share a few pictures of my journal.
I've used some Graphic 45, paper for the inside cover as I just love the butterflies.
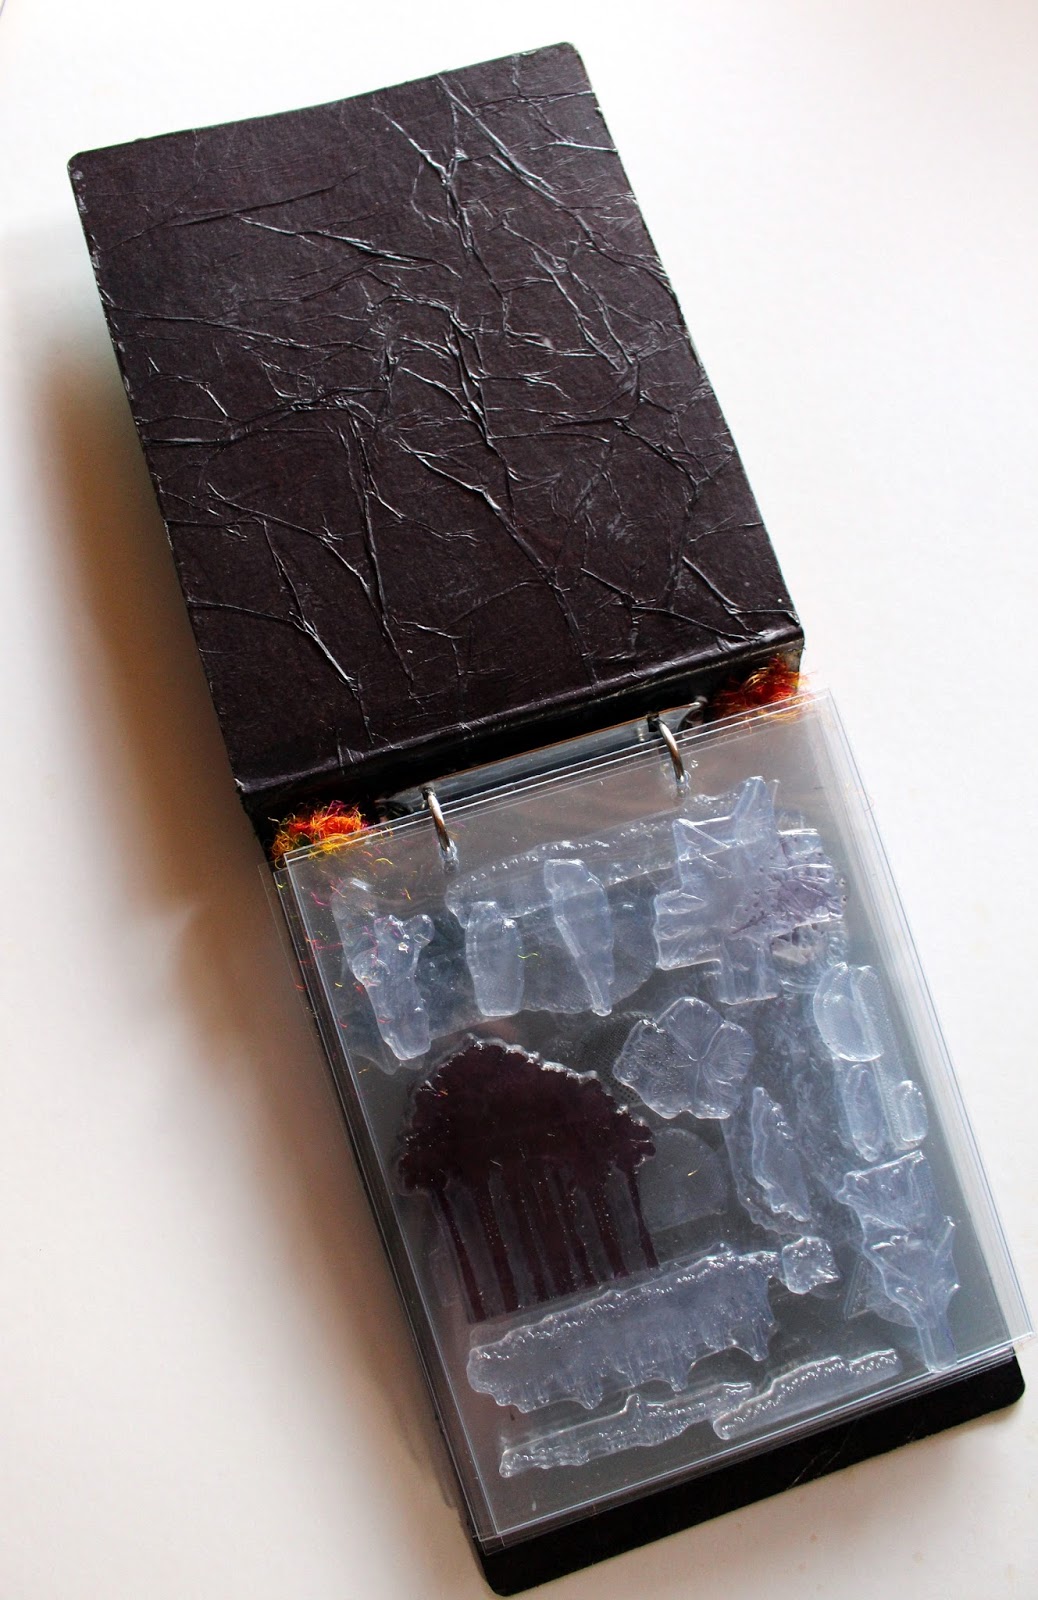
I've made a Kraft paper pocket at the beginning of each of my three signatures, courtesy of Anne. She has an excellent tutorial for making this as well as an expandable pocket, on her blog, which you can see with this link. I've also wrapped each signature with a piece of patterned paper, from Tim Holtz, Wall Flower, paper stack. I can't get enough of this gorgeous paper! The signatures are made of crisp, white, thick cartridge paper, so that I can use the journal as a nature sketch book. I decided to sew my signatures into the journal cover with linen thread. I just added a couple of extra holes either side of the central hole.
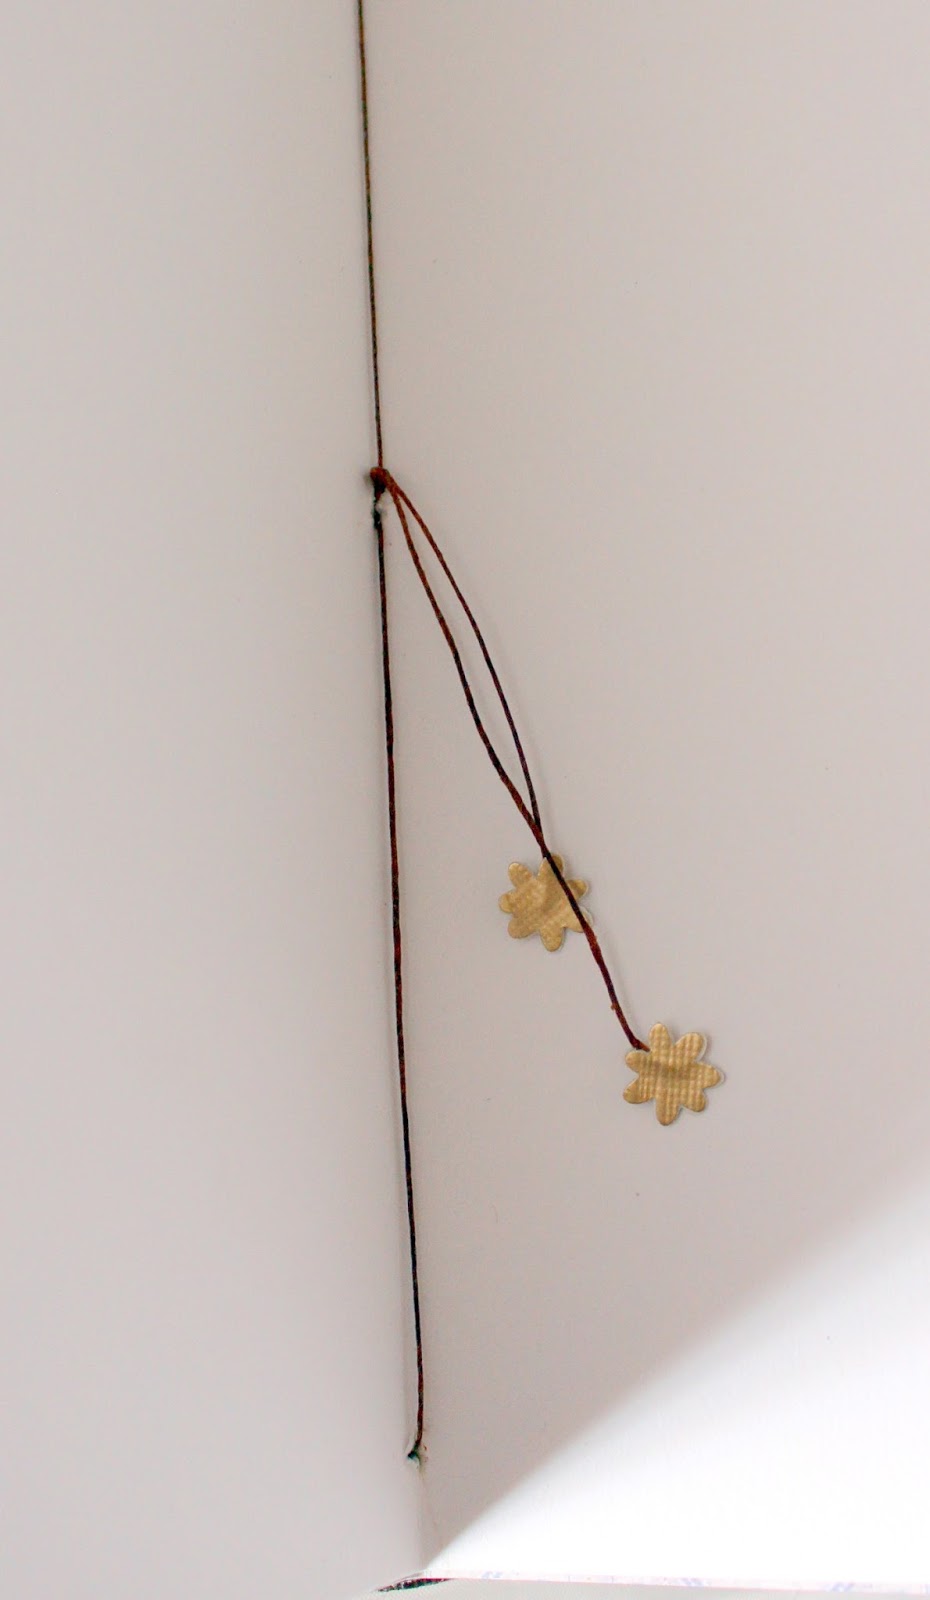
I also left a long piece of the thread on the middle signature, so that I could thread some glass beads on to it. These beads were salvaged from a necklace, I bought in a charity shop. The necklace was my original inspiration for the colours I've used.
Here is the linen thread on the inside. I adhered some little punched flowers to the ends of the thread. Not my idea, but I think it adds such a lovely finishing touch.
I made the belt closure, with a narrow strip of Kraftex, which has been painted and stitched close to the edges. The buckle was bought in a set from The Works,  4 buckles for £1. Excellent value for money I'd say! They come complete with a little brads to attach them.
I poked the brad through a single layer of the belt and folded it over and added a spot of glue.This conceals the 'butterfly' back of the brad.
To finish off, I stamped this sentiment onto a piece of plain Kraftex, and glued it to the back of one of Tim Holtz 'Ornate Plates' . I put a couple of brads in the holes and adhered it to the front of my journal. So there you have it! My first Eileen Hull, Heart Felt Journal. Maybe this is the first of many.....that's if I can get my crafty hands on that very elusive die! In the meantime, many thanks to Anne for the wonderful inspiration you have shared on your blog and across social media, and for taking the time to share these wonderful journal die cuts, which I believe are available in both yours and Eileen's, etsy shops.x

Friday 21 July 2017

Get Hip For Summer ~ Tim Holtz~ Summer Challenge.

Hi everybody! I couldn't resist joining in with Tim Holtz's summer challenge, after my lovely Hipster Stamps arrived. You can see all the fab entries with this link As every bonafide hipster needs a little black book, I decided to make one for this cool cat! I've used Eileen Hull's Passport Book Die, and a range of Tim's goodies. The cool cat has been stamped onto acetate and coloured with Alcohol Inks. I then gilded the back of the image with silver leaf. I stamped the same image onto clear shrink plastic and coloured it lightly, before cutting it out and shrinking with my heat tool. I've enjoyed making this and joining in with the challenge, many thanks Tim....... see you in September !x 

Thursday 13 July 2017

Stamp Storage Binder

Hi everybody! It's my turn over on the Stamps and Stencils blog, to put together an Inspirational Post, so if you'd like to know how I turned this.........
with a touch of this.......
and this.......
into a fab stamp storage binder.........
Then hop over to the Stamps and Stencils blog with this link and be prepared to be inspired! Hope to see you there. x

Thursday 6 July 2017

Colour, Texture, Shape


Hi everybody! It's time for a new challenge over on the Stamps and Stencils blog. Our host this month is the very talented  Ruth and she has something a little different for us. Ruth has constructed a mood board with lots of gorgeous colour, texture and shape. I think you'll agree that there is plenty of creative inspiration here.
This is what Ruth has to say........

'Maybe it's the colour palette ranging from cream and peach through to gold, warm browns and soft greens that inspires you...or you want to choose different colours and use fabric, lace or metal in your project as texture? As for shape, what about flowers, leaves and architecture or the design elements that are gothic, steampunk or romantic? Whether your inspired by one or all of the pictures, please share your mixed media creations with us, the only restriction - you must use a stamp or stencil somewhere in your project. Can't wait to see what you're inspired to create!'

My project for this challenge, is an 'upcycled' sketchbook.  Can you guess which of Ruth's pictures I have drawn my inspiration from?

This is how it started out......
It's an A5 sketch book, with a kraft cover, bought from Hobbycraft, for the princely sum of £1. I think these are great value and once they've been given a makeover, they make lovely gifts for crafty friends. The kraft cover is a great substrate for working a little mixed media magic on !
 I began my transformation, by firstly adhering some book pages to the covers, with matte medium.I brushed a thin layer of white gesso over the surface, before adding some light stencilling around the edges, using Distress Paint in Frayed Burlap, through a Tim Holtz 'Flourish' Layering Stencil. I'm afraid I didn't take photos through the process so I have included some close up shots ...


Once my background was dry, I added the peach coloured rose,which is taken from a layer of a printed paper napkin, again, adhered with matte medium.


I really like the way that these kind of 'transferred' images retain their transparency. The next layer, was to add some stamping. I chose the birds and the text, from from Tim's 'Bird Feather' set of stamps and used black Archival Ink. I finished off  by blending a little  'Potting Soil' Archival ink, around the edges. In order to complete the 'upcycling' of my humble sketch book, I added a strip of 
co-ordinating  fabric to the spine of the book. I then punched a couple of holes all the way through the middle of the book, threaded a length of dyed seam binding through, and tied it into a bow on the outside. I think these final touches add an extra bit of smartness to the finished book. 

If you would like to join in with this month's challenge and need a little more inspiration, please hop over to the Stamps and Stencils blog and take a look at the fantastic projects by the rest of the team. We would love to see your creations ! x