Friday, 26 February 2016

Twelve Tags of 2016 ~ Technique Remix ~ February

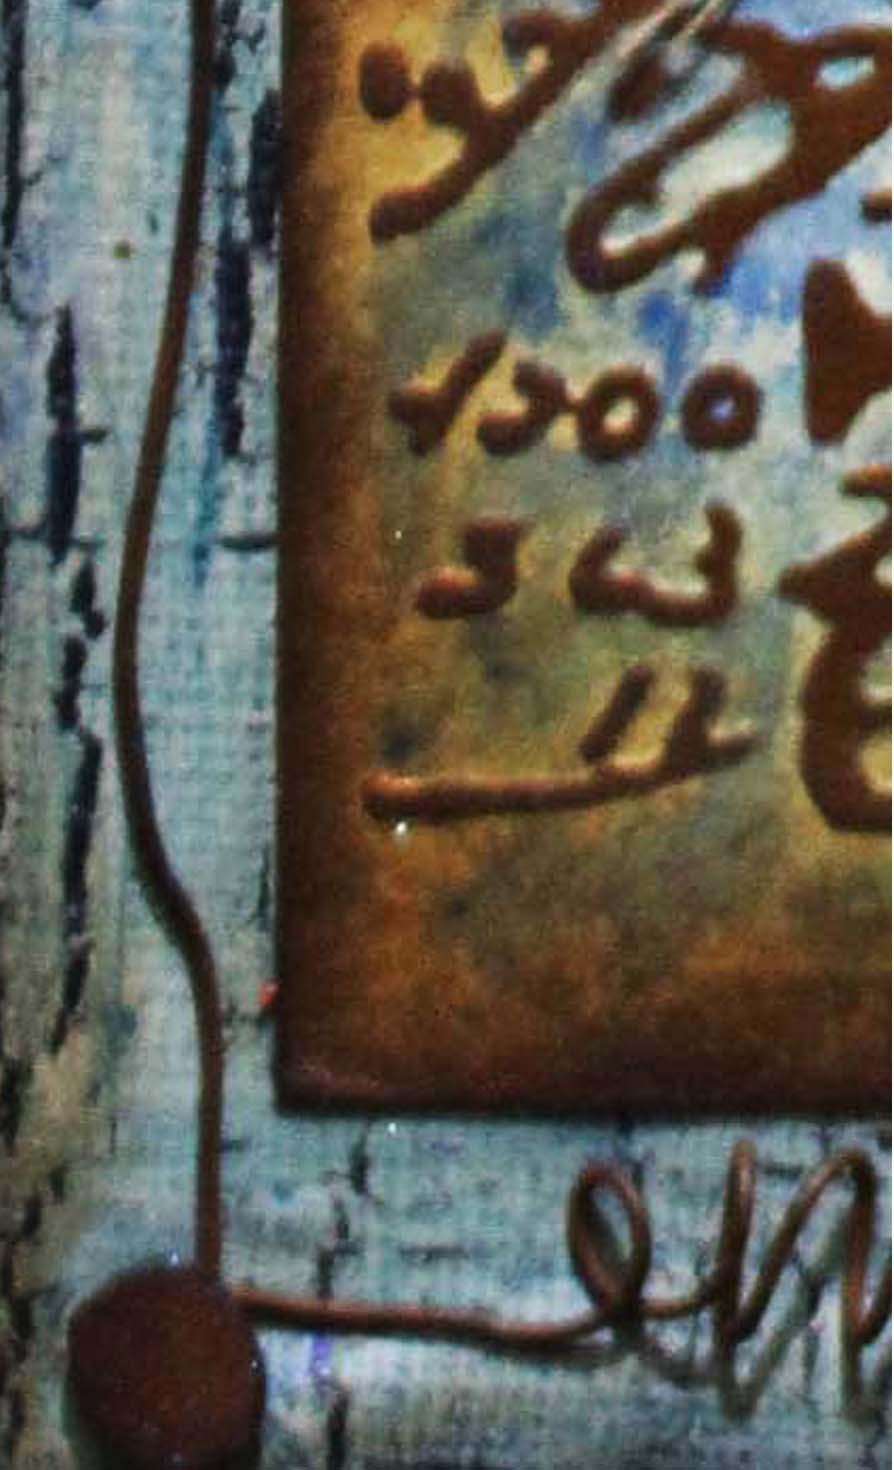
Hi everybody ! well we are nearing the end of the month and I thought it was about time I posted my February tag for Tim's Twelve Tags of 2016 challenge. I'm loving Tim's Technique Remix ! This month he has chosen to mix it up with Monoprinting and Embossed Texture Paste. You can see his gorgeous tag by following this link. I've stuck fairly closely to Tim's original idea and just used a few substitutes here and there. I've also used a rather long quote from a W B Yeats poem, a particular favourite of mine. It fits the story I have in my head, for the woman in the Photo Booth picture. I feel that she just has that look of vulnerability  in her eyes.
 Once again a great fun tag to make and a chance to brush up on some technique skills, Keep 'em coming Tim ! x

Thursday, 4 February 2016

Splatter, Spritz, Smoosh ! ~ New Challenge for Stamps and Stencils

Hi everybody! It's time for our new February challenge over at Stamps and Stencils. Sue is our very talented host this month and she has chosen 'Splatter,Spritz, Smoosh'. I'm sure you'll agree, that this is a great challenge theme. After all, what piece of self respecting, mixed media work doesn't contain a bit of splatter,a touch of spritz and a swipe of smoosh ! I think there's a lot of fun to be had with this theme. I certainly enjoyed making this vintage style Valentine, accordion card. .
 I started off with a piece of card measuring 16 x 4 and scored it at 4 inch intervals. I then dabbed Distress inks on my craft mat, 'spritzed' them with water and 'smooshed' the card through the colours. This great technique from Tim Holtz, is the foundation of so many of my paper craft projects. I blended a little Brushed Corduroy Distress Ink around the edges to add to the vintage look.I rather cheated with my 'splatters' and used a set of Indigo Blu stamps, called Ink Splats. They're very cute and just the right size for this project.I used a few bottle tops to create some additional circles, and stamped the text using Tim's Ledger Script Stamps.....such a useful set of stamps. I made a little tag and a small envelope with the same technique, minus the text stamping.
The rather wistful image of woman, was something I downloaded from the internet. I made the heart with a piece of embossed, aluminium foiled, card. I 'splattered' some Distress Paint on the surface, left it to dry and then lightly sanded the surface.
The butterfly was made in the same way. Once all the elements were adhered to the card I tucked  a little stamp ticket into the envelope and a tag into the heart. A couple of finishing touches, such as the mother of pearl button on the heart and the game spinner on the butterfly and my valentine card is almost good to go. The back of the card is also rather splattered but not in a pretty way, so I shall cover it with some nice printed paper. Hmmmm! now who to send it to? I suppose after nearly 36 years of marriage, it better be my DH !
If you fancy having a bit of a Splatter, Spritz and Smoosh, hop over to the Stamps and Stencils blog where you'll see some fantastic work from the rest of the design team, as well as all the challenge details. Just remember to use some stamping or stenciling or both ! We'd love to see what you create !

Sunday, 31 January 2016

Twelve Tags of 2016 Remix Challenge ~ January


Hi everybody ! I finally found some time to devote to making my first tag of the year, for Tim's Twelve Tags of 2016 Remix Challenge. This year, Tim has added to the challenge by combining two techniques from the previous year, in a what he describes as a 'technique remix'. This is a great idea as it will give us all a chance to revisit some fantastic techniques. You can see Tim's fabulous January tag and read about the the new challenge by following this link. For me this month has been a little bitter sweet, as Tim has combined one of my favourite techniques, Industrious Metal, with my least favourite, Chalkboard. So what can I say it's been a bit of a challenge. It took me several attempts  to conquer the chalkboard ! Do you think it's because I'm a teacher? maybe I've got an aversion to chalk !
 The ones that got away !

Thursday, 14 January 2016

Having Fun with Gesso Over at Stamps and Stencils

Hi everybody! It's my turn to inspire you over on the Stamps and Stencils blog. I've chosen to have a play with gesso and I have to tell you, I'm pretty pleased by what I've discovered about this lovely stuff ! It's got so many possibilities. I can see that the big pot I've just been using to prime my canvasses, is going to get an awful lot more use now. If you'd like to know how you can get more out of your gesso, hop over to the Stamps and Stencils blog. You might just want to grab a cuppa first as there are lots of pictures! hope to see you there.x

Thursday, 7 January 2016

Oh So Blue ~ Stamps and Stencils ~ New Challenge ~ January

Happy New Year everybody! I'm just wondering where the last year went. Still it's onwards and upwards and what better way to start the new year with, than a new challenge from Stamps and Stencils. Cec is our talented host this month and she has chosen the title 'Oh So Blue'. You can see her gorgeous journal page here. There's nothing like a bit of crafting to chase those January blues away!   My project consists of this mixed media canvas,using several different blue media. Unfortunately my camera was out of action during the making of this piece ( no panic just a very flat battery!) so, I'll zoom in and just outline the different processes I've used.
The canvas substrate was firstly painted with dark blue acrylic paint, once dry I added a coat of crackle paint medium and then added a top coat of Paperartsy Fresco Finish Paint, in Mermaid. Once all the lovely cracks had appeared, I decided to give it a deeper blue colour by brushing on a thinned coat of Luminarte Silks Acrylic Glaze. This also had the advantage of adding a nice pearly sheen.
The next layer is a piece of manila card which has been coloured with Ultramarine  Brushos. I embossed the card using one of my favourite Tim Holtz embossing folders, I then used Treasure gold to highlight the textured surface, and added a bit of vintaging around the edges with Distress Ink
 The heart was hand cut from corrugated card, and heat embossed, using the Wonderful Wendy Vecchi's  faux granite ware technique. Follow this link to learn from the master. After heat embossing it, I stamped over the surface using Black Archival Ink and a stamp from  Andy Skinner's 'Industrial' set. I really like this stamp as you can achieve an aged cracked effect in an instant.
I tucked a little piece of muslin behind the heart before securing it to the background. The butterfly, is a die cut from Tim's Butterfly Duo. This is a Bigz Die with a corresponding embossing folder. I initially heat embossed the butterfly, with copper embossing powder but felt I was moving too far away from Cec's 'blue' theme. I also wanted to give it a bit more oomph! I got out my Indigo Blu Flitter Glue and Winter Dawn Mega Flakes, and pulled out a few flakes that had some beautiful shades of blue and copper, I love the effect this has created. I used a rust finished pointer for the body and adhered the little gem for some added blueness!

 My final embellishment is the word 'Remember'. I used one of Tim's Framed Alpha Parts and gave it a rust finish. I chose this word as I have some happy memories of 2015. One in particular was the Wendy Vecchi workshop my bestest crafting buddy and I, attended in the summer. we had a a great weekend in London topped off with a super event where I was able to meet some of my UK crafting heroes. Our Sue being one of them ! So come on folks shake off those blues with a bit of total immersion. Hop over to the Stamps and Stencils blog where you'll find some fantastic inspiration by the team as well as all the challenge guidelines. I'm looking forward to seeing your creations ! x

Wednesday, 30 December 2015

Twelve Tags of 2015 ~ December ~ The Final Tag !

With hardly any time to spare, I have just completed my final tag of the year for Tim's Twelve Tags of 2015. You can see his fabulous December tag by following this link. It's been a great year for the Twelve Tags Challenge, with, as usual, some ingenious creative ideas from Tim. I'm pleased with myself  that I've managed to complete yet another year of tags. This one has a few improvisations. I haven't any of the lovely punches that Tim has used on his tag. It's sometimes hard for us in the UK, to keep up with new products as they are often in limited supply and you have to be pretty quick off the mark to grab them. Still I'm glad I was able to use the Box Wood Twine, I'd bought a while ago. I used the Poinsettia Layering Stencil in the background as this has been a firm favourite for my Christmas cards this year. I've given them some gold centres by dotting with a gold leaf pen. I made a lot of these little Christmas trees last year after they were sold out just about everywhere. I used sisal string, wire and a hand drill.This is one of three that were left over. I trimmed it so that it would lie flat and glued it on with my glue gun. This is what I did with the other two.....
I was thrilled when I saw Tim's trophy cup project, as it was perfect for these two little cups I bought earlier this year from our local junk shop. I knew they'd come in handy!
Well that's it for this year. Thank you Tim for all the inspiration you have given us this year. May you have a wonderful 2016 !!!! x

Thursday, 3 December 2015

Grungy Christmas ~ New Challenge at Stamps and Stencils

Hello everybody ! It's time for our final challenge of the year over at Stamps and Stencils. If you've been over there, you may have seen that there are going to be some changes as we go into the New Year. Sadly we are saying good bye to three of our lovely team, the very talented ladies, Julia, Yvonne and Sharon are moving on. I'm sure that like me, you have enjoyed seeing their fabulous projects over the last year.  Luckily for the rest of our team we have manged to lure in not just three but four wonderfully talented ladies to step into those big shoes ! You may already know that Cec has joined us, and our other new teamies are, Autumn, Branka and Rachel. It's going to be a lot of fun getting to know them.
So now on to this month's challenge. Julia is our host and she has chosen a 'Grungy Christmas' as the theme. You can see by my altered gift box, that I definitely got stuck into the 'grungy' part of the title! I chose to alter an empty box, which originally had some posh soaps in. This was a Christmas present I received last year and try as I may, I just can't bring myself to throw a good box away! here is the 'before' picture......

I used a technique I learned at one of Finnabair's workshops, I love her distinctive style and this project pays homage to her. I gave the box a coat of black gesso before stencilling over the surface with thick gel matte medium.
Once this was dry, I applied more black gesso and then started to assemble all the bits and pieces I used to decorate the surface. I played around with a few arrangements and once satisfied, I adhered each piece, using a hot glue gun.
As you can see, there are a variety of different materials, metal, resin and plastic, chipboard and wood. Once everything was secured, I then painted everything with even more black gesso! once this was dry, I spritzed on a bit of gold spray.
I then painted selected areas with iron paint. This came as part of a two pack rusting kit. The kit contains a bottle of iron paint and a bottle of oxidising solution. The one I have is by Triangle Crafts and it's called Instant Rust Set. the great thing about it, is that it creates real rust and you never quite know how it's going to turn out ! 
Here's how it looked before I got started with some metallic pastes .....
I used Treasure Gold and Inca Gold to highlight certain areas, and buffed the surface to add a bit of sheen here and there. I added a few bits of bling  here and there using pearls, and gems. After all it wouldn't be Christmas without a bit of bling !
So there you have it my Grungy Christmas gift box ready to have some goodies put inside, Question is can I bear to part with it ? If you fancy some Grungy Christmas fun, hop over to the Stamps and Stencils blog and you'll find all the details of how to join in the challenge. You'll find some fantastic work by the rest of the current team and also have an opportunity to meet  Autumn, Branka and Rachel. 

Monday, 30 November 2015

Twelve Tags of 2015 ~ November

Back to normal here at craft dabbler central! Here I am, posting my November entry for Tim's Twelve Tags of 2015 challenge, with only hours to spare ! As it is so late, I felt as though I'd missed the opportunity to recreate Tim's fabulous Autumn tag, so I've skipped a season and gone straight into winter ! There are several things I love about the techniques Tim has shared this month. Firstly the 'linen look' background, very cool and I will certainly use that again. Next, the transfer foil used around the edges. I've gone with a silver holographic foil on this tag, it's something I've had for ages so it's great to give it some use. I also love the cut out letters, I've used a word from the Sizzix 'Happy Holidays' set I bought last year and cut it from a strip of shop bought, gessoed canvas. I think the ripped edges add an extra touch of frostiness. There's also a touch of glitter added to the snowflake, Let me know if anyone out there finally nails the secret to photographing glitter. It's there in my view finder! So there you have it!  Once again a great tag to make. Thank you Tim, we're almost there now, and I've got another fab tag to add to my growing collection! x

Thursday, 5 November 2015

'Remember, Remember....' ~ Stamps and Stencils ~ New Challenge

Hi everybody ! It's the first Thursday of the month and that means it's time for a new challenge over at Stamps and Stencils. I hope you enjoyed our last challenge along with the blog hop. Many thanks to all of you that joined in and paid me a visit. Ruth is our talented host this month and she has chosen 'Remember, Remember'. This is what she has to say .......

Hi, Ruth here with this months challenge which is 'Remember, Remember'......it may be the 5th of November today (Bonfire Night in the UK) but for this challenge we want to see mixed media projects inspired by 'favourite memories', you can interpret this in any way you like as long as you include some stamping or stencilling in your mixed media piece. What we want to see is how a favourite memory has inspired you, so don't forget to mention this in your post. 

Roberta and Me and the Bumble Bee
When I started thinking about the challenge, I soon realised how lucky I am to have a lot of happy memories, from my childhood right up to the present day. You can't ask for more than that ! I decided to go with a memory that always makes me smile. I was about 6 years old and it was one of those endless summers that you only have when you're a child. My best friend Roberta and I, had been 'playing out', when we noticed that an 'enormous' bumble bee had landed on the skirt of her dress. Now, as inner city kids, all we knew about bees was that they made 'hunny' and if they landed on you, you had to stay very still or they would sting you. We stood perfectly still, for what seemed like hours. I can't begin to tell you how terrified we were! I'm not sure how our dilemma ended but needless to say neither of us was stung.
So my project is this journal spread of Roberta and I in our summer dresses. who knows it could even have been taken on the same day!
I started off by taping two pieces of watercolour paper, side by side, with masking tape. I then glued on various textured elements including some pieces of bandage and washi tape. Finnabair, showed us this technique during one of  her workshops I attended last year. Working on   both pages at the same time, helps the flow and balance. 
After coating the surface with white gesso, I stamped, using some of my homemade stamps, with fluorescent acrylic paint. 
I then sprayed here and there with Dylusions Sprays and encouraged some 'drippage' by spraying with water.
I added some stencilling and doodled around the flower with black and white pens. I'm still looking for the 'ultimate' white pen ! I also used a black Stablio pencil and water brush to add a bit of depth.
I then stamped Dina Wakley's bumble bee and coloured it with paint, and then added a bit more stamping around the edges, using black Archival ink. It was then time to remove the pages and try them in my journal. I adhered them with matte gel  and added a print of the photo and a few finishing touches. So now it's over to you, this has been a great fun challenge for me and I'm sure you'll enjoy it just as much as I have. 
Such happy care free days when all we were scared of was a bumble bee !

Saturday, 31 October 2015

Twelve Tags of 2015 ~ October

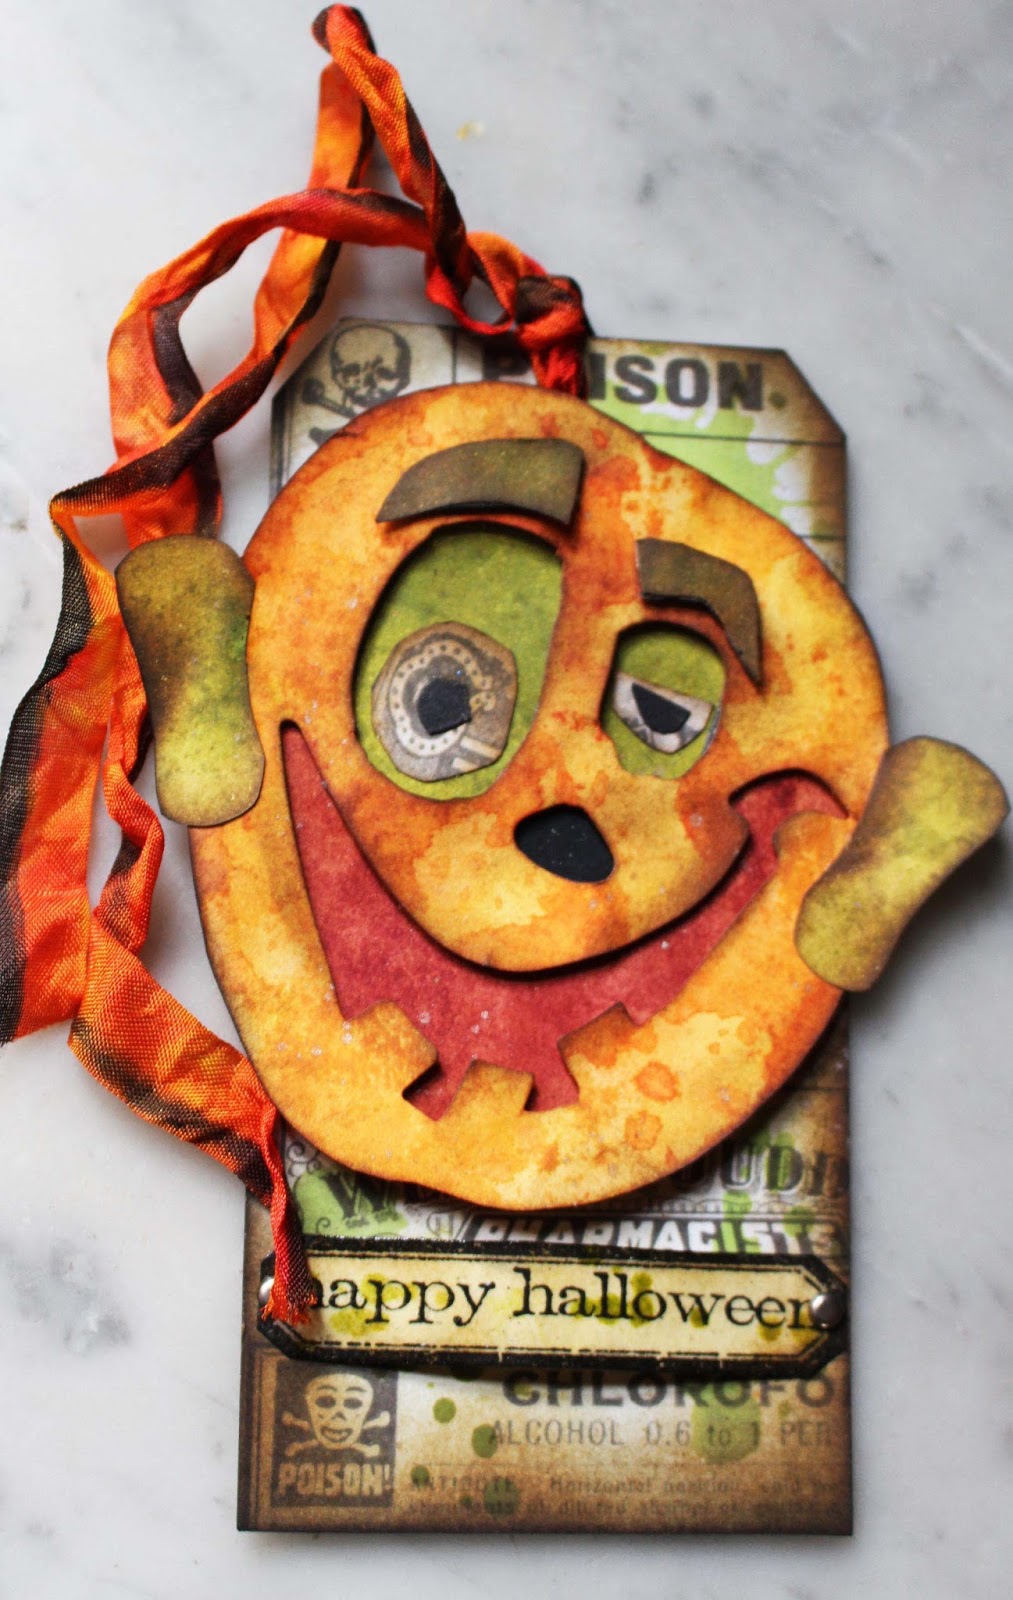
Well here I am posting my October tag, for Tim's Twelve Tags of 2015 challenge, on the last day of the month ! I must confess I have been dragging my feet over this one. I love the new Monster dies that Tim has released and as tempted as I am, my crafty budget will just not stretch quite that far. So my tag this month is all about improvising and using my stuff ! I must say I'm quite pleased with the results. I followed the same techniques Tim used on his fabulous tag and made substitutions for the products I haven't got. The background paper is from Tim's  Laboratoire Paper Stack and the monster face features were cut with  Movers and Shapers 'Mini Silly Jack O Lantern dies. So that's it for another month, at least I won't have long to wait and see what Tim has in store for November ! Happy Halloween folks x

Thursday, 1 October 2015

New Challenge for Stamps and Stencils ~ Make it 3d ~ Hop to it ! .........

Hi everybody, Its' time for a new Stamps and Stencils challenge. Sue is our host this month and her challenge title is 'Whatever it is Make it 3D'. She has also added to the  fun with a blog hop and a prize for one lucky person who discovers our secret word. If you've arrived here from Sharon's blog, you are in the right place to gather another letter to help you solve the puzzle. I hope you've been enjoying seeing the fabulous 3D projects made by my talented teamies. I decided to go for pure fun  with this Halloween home decor piece. I've had a great time putting this together, using dies, paints, inks, embossing powders, sprays, stencils, stamps, glitter and gems. In fact every thing but the kitchen sink  I'm looking forward to seeing what my little nieces and nephews think of it, when they come round for Halloween.  As this is a blog hop, I won't go into a lot of depth about how I made it, instead, here are a few pictures of some of the stages.......
 Now, you need to hop on over to Sues blog, with this link, where you'll find the final letter. Don't forget to leave a comment on each of the blogs, we always love to know what you think of our work and of course please join in with our 3D challenge, just remember to include some stamping or stenciling in your project.  Oh! and before I go you'll need this.... L ...... Happy hopping !

Friday, 18 September 2015

Twelve Tags of 2015 ~ September

Hi everybody! I can hardly believe that I'm posting my tag for Tim's twelve Tags of 2015 challenge, before the last day of the month. Hooray! I managed to snatch a few hours in my crafty attic yesterday afternoon and I knew, I would (as always), enjoy making my tag. I absolutely love the gorgeous colours on Tim's tag this month, so I started off by having a play with my alcohol inks.......
These are some of my bright backgrounds. I was struck by how much difference it made to the backgrounds, when I added an inked edge to them, as in the first and last in this line up. I was on a bit of a roll and made quite a few backgrounds, experimenting with different colour combos and spraying or dripping on blending solution.......
These are some of my favourites, using a more neutral colour palette. As you can see from my finished tag, it was one of these that won the day. The others will be put aside for future use. I haven't got those fabulous butterfly stamps that Tim used and although I have other butterflies, I decided to think outside the box. After much perusing through my stamp collection I decided to go a little spooky with the wonderful skull stamp, and make  my first Halloween project of the season. thanks once again Tim, I'm always amazed that you can come up with such brilliant ideas and techniques month after month.......speaking of which there are only 3 more to go ! x 

Thursday, 3 September 2015

Up, Up and Away~New Challenge for Stamps and Stencils

Hi Everybody! It's the first Thursday in the month and that means  it's time for a new challenge over at Stamps and Stencils. Sharon is our fabulous host and this is what she has to say......

 Up, Up and away with a twist ! For this challenge we would like to see something that goes Up Up and away. It could be a plane, bird a feather anything that can go up, but you must use /autumnal colours. So get out the copper, rust and burnt oranges. Be it paint, metal or embossing powders, don't forget to include some Stamps and Stencilling....

I think you'll agree that this is a fabulous challenge, with plenty of scope. I love autumnal colours and I have plenty of  'winged things' stamps ! My project is this little four piece panel with lots of stamping and stenciling. I started by colouring some pieces of manila card with Dylusions Sprays. 
I dried them with a heat tool and then ironed them flat. I then selected a few stencils and added some pattern with Distress Inks in similar autumn shades.
I then die cut the four arches, one from each background piece, and also four more in thicker craft card. I then adhered the coloured arches to the craft card using Matte Multi Medium. The added bonus is that I've still got lots of coloured card to play with! I had a lot of fun selecting the stamps and building a kind of stamped collage on each shaped piece. I used black Archival ink for stamping and clear embossing powder over the top. Once I was happy with the arches, I gave each one a quick spritz with a gold spray. I have the tiniest bit left of a gold spray by Crafty Notions. It is the best I've ever had, really sparkly and has never clogged up in all the years I have had it. Yes years! I digress....Here are some close ups of the individual panels
number one....
and two....
and finally....
As you can see, the panels are joined together by adding brass eyelets and threading through some dyed ribbon. There is a little dusting of gold embossing powder here and there and the edges have black Archival Ink blended in.  This was a lot of fun to make, sometimes it's lovely to get down to some good old stamping ! I hope you can find some time to join in with our challenge this month, dig out those stamps and stencils and get stuck into some lovely Autumn colours. You'll find all the challenge details and see some wonderfully inspiring pieces by the rest of the brilliant design team by following this link. I look forward to seeing what you come up with, For now though it's Up, Up and Away to finish cooking tea! x


Tuesday, 25 August 2015

Twelve Tags of 2015 ~ August ~ Uncle Jim

Hi everybody!I hope my UK friends are enjoying this typical British Summer, rain, rain and more rain ! Still, the best way I know of cheering myself up on a wet afternoon, is spend some time in my craft room. Thanks to Mr Holtz, I happily spent a few hours absorbed in making my tag for this month's Twelve Tags of 2015 challenge.  I was a bit daunted when I first saw Tim's tag, as I haven't got any of the  lovely Word Block Dies. I'm also running low on Ideaology bits and bobs. Still, I see this as all part of the challenge, it makes you put your thinking cap on! For my die cut background I used Tim's Typeset Alphabet strip die. As I use a Big Shot die cutting machine, I was able to cover the last inch of the tag with a thicker piece of card in order to prevent the die from cutting through the bottom of the tag. The cool looking dude in the picture, is my ' Uncle Jim'.  He came to England from Nigeria, at the same time as my dad, in the early 1950's. They were best friends and our two families spent a lot of time together as we were growing up. They remained firm friends throughout their lives and sadly, they passed away within a year of each other.  I love this picture and have welcomed the opportunity to use it this month's tag. x

P.S. Just been having a look at this month's entries, wow.. there are some fantastic interpretations!

Thursday, 6 August 2015

Time Flies ~ New Challenge for Stamps and Stencils

It's the first Thursday of the month and that means it's time for another challenge over at Stamps and Stencils. The very talented Yvonne is our host, and this is what she has to say......

'For this challenge we would like to see clocks/watches/or any other time related element
 as a focus on your project. Remember we are are a mixed media challenge blog
and we would like to see some stamps and/or stenciling'

 While I was mulling over the challenge title, the song, 'Fly Like an Eagle', by The Steve Miller Band, with the opening lyric, 'Time keeps on slippin', slippin', slippin' into the future....', sprang into my head. This set the theme for my project, which is a little 5x7 inch canvas, in a fun 'Steam Punk' style. I got a bit carried away as I was working on it and haven't taken too many photos of the process, however, here is a shot of the background before it got covered up.....
In this picture, you can see the stamped tickets laid out on the surface. You can also see a bit of a splodge in the middle. This is where I had stamped directly onto the canvas and then changed my mind and decided so make stamped tickets instead. The original stamping didn't show up enough, so I stamped some small die cut tickets with the months of the year and adhered them to the background.
The die cut pocket watch, was treated with Vintage Photo, Distress Embossing powder and a smear of Treasure Gold around the edges. The stamped image, has been coloured with Distress Markers and a water brush. The wings have been cut from card covered with aluminium foil tape and then embossed with a cogs and gears embossing folder. They've been coloured with Alcohol Inks and have had a few cogs attached to them.
I love the phrase as it just about sums up 'time' to me. So lets all make a point of using a bit more of it to do the things we love !!!
If you've got a bit of time on your hands and would like to join in with our challenge, hop over to the Stamps and Stencils blog with this link and you'll find all the details of how to join in. You will also find some fabulous inspiration from the rest of the design team. I look forward to seeing your creations. x