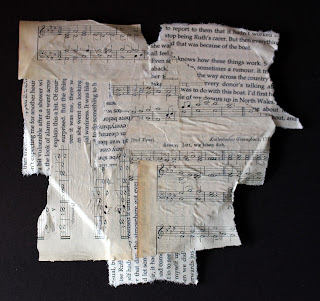
No I am not sending you to school but thought it might be fun this month to make a collage. You can use any substrate such as canvas, corrugated cardboard, wood, or canvas boards for instance and add any items to it as long as you include some stamping and/or stenciling.
As usual with our challenges, I think you'll agree that there is plenty of scope for creativity here!
As we are officially in the month of romance, I've chosen to make 'vintage style' romantic project. This how I got started.......
The substrate is a laser cut wooden heart, which measures around 15cm x15cm.
I covered the heart with a layer of book paper using Matte medium to secure it....
I didn't bother cutting the paper to size, instead, I left it to dry and used a piece of sand paper around the edge, to remove the surplus paper. This works so much better than trying to trim it with scissors.
I then gave the surface a thin coat of gesso and once this was dry I added some stencilling with crackle paste, as well as some fabric flowers and pieces of scrim for added texture. I then gave it another coat of gesso.
To add colour to the background, I sprayed the heart with Vintage Photo Distress Spray. Now, this wasn't the best idea as I wanted to dry brush the surface and of course Distress Sprays are water based, which meant that when I tried dry brushing, the paint just reactivated the ink and didn't really give me the effect I wanted Doh!. So I decided to seal the surface with Deco Art Ultra Matte Varnish. This moved the colour around even more, which was quite helpful as it didn't require any more colour to be added.
This is the heart before I added the Ultra Matte Varnish. After leaving the heart to dry completely, this is absolutely necessary, I then proceeded to dry brush the surface using Deco Art Americana Chalk Paint, and a firm bristle brush. Once this was dry I added a little stamping , using a script stamp and brown Archival Ink. Here's a close up......
I then turned my attention to putting together a little collage to attach to the surface. I gathered together the elements I wanted to use and tried out a few different arrangements, before lightly adhering them together. I found that some of the colours were initially too bright for the background. For example, the red hearts of the playing card, jumped out far too much, to combat this, I gave some of the pieces a very thin coat of gesso. I also lightly sanded the birds, which added a further textural element.
The birds are from a lovely pack of gorgeous snippets by Tim Holtz called Botanical Layers. I trimmed the background foliage a little, so that they look more balanced on top of the other collage elements. To finish off I added a sentiment from Tim's Small Talk Sticker Book. I then mounted the collage on the heart background, using dimensional tape. A metal rivet added to the hole and a piece of linen thread as a hanger, were the final touches. I'm sure I always say this but it's true, this was a fun project to put together! If you'd like to try your hand at a bit of collage, then why not join in with our Stamps and Stencils February challenge. Just hop over to the blog with this link and you'll find all of the challenge guidelines, as well as seeing some fantastic, inspiring projects by the rest of the team. I look forward to seeing what you come up with. x


This is turning Toni ! Your background is just wonderful with all those wonderful textured pieces and a fabulous collage of papers too. Jennie x
ReplyDeleteWhat an incredibly beautiful collage this is Toni! I adore that lace and your subtle staining. Wonderful project! Hugs, Autumn
ReplyDeleteFabulous heart Toni, the background looks amazing and I love the addition of the collage. What a great take on the theme!
ReplyDeleteLula x
Awesome work Toni - a beautiful heart - I love it! Hugs rachel xx
ReplyDeleteSo beautiful and romantic!! I love it all!!
ReplyDeleteBeautiful project Toni ! Love the lacey background and the stencil is one of my favourites. Sue C x
ReplyDeleteWow Toni, another vintage beauty. I think that flourish stencil is an all time favourite, beautiful choice of ephemera and those lace flowers are perfect. Delightful and if it was fun to make as well it's perfect! Hugs Ruth xx
ReplyDeleteThis is definitely romantic in a lovely vintage way. I "heart" it.
ReplyDelete