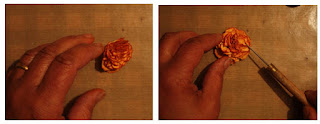
You will need some fairly light weight card some punched or die cut flowers, water mister, distress inks of choice, a 'pokey tool', tweezers and some tiny brads. Each of the flowers I've made have 8 layers. For this tutorial I've used the 'middle sized' flower from Tim Holtz Tattered Florals die. You will also need a craft mat and a cutting mat, or similar surfaces.
Take eight flowers and use a blending tool to colour each one on both sides. Spray with water and leave for a couple of minutes so that the water absorbs into the card.
Then squash each flower shape between your fingers to form a sort of conical shape. slightly screwing each one up
Be careful not to rip the petals as the card will be fairly damp. Leave them for a couple of minutes for the creases to set.
Now get your brads, pokey tool, tweezers and cutting mat at the ready. Gently open each flower shape and place one on top of the other rotating each layer so that they are not all in a uniform stack.
Using your pokey tool, make a hole through the middle of the layers, watch your fingers! hold the flowers together and secure with a small brad.
Now, using your tweezers, gather up the top layer of petals, and squeeze them together quite tightly. Repeat with each layer until you have what looks a bit like a flower bud.
At this stage, I like to mist the flower bud with a little water and gently dab across the edges of the petals with a little distress ink. once you get the hang of this you can experiment with the colours you use.
Finally, place your flower bud on your craft sheet and gently open each layer starting from the bottom and working your way up each layer. Leave the centre more tightly closed and the brad will not be visible. There you have it, a gorgeous vintage style flower. Leave it to dry thoroughly before using.
Hope you've enjoyed my first step by step, by way of a reward for those that have made it to the end of this post, leave a comment letting me know what you think and I will have a random draw on Sunday to win a selection of the flowers I have made. Thanks 'pinkaboo6691' whose video on youtube got me started and to my lovely son Max for his help with the photos x


I have made some flowers very much like these. I have to say your step by step instructions are fantastic, thank you
ReplyDeleteRia
Wow... amazing flowers, and a fantastic tutorial - thank you so much!
ReplyDeleteAlison x
I love your flowers and your tutorial is excellent and very clear - thank you. I love making flowers too but will try out your way as the finished result is gorgeous. Hugs, Anne x
ReplyDeleteI so love those flowers.
ReplyDeleteAs someone who doesn't own a die cutting machine (yes, can you believe that) I am sitting in awe of the fact you can create your own flowers at any given time.
Beautiful.
Wishes
Lynne
Excellent tutorial . We have a flower die so will be having a try of this later, thank you.
ReplyDeleteSimply Stunning!!! I seriously doubt I can achieve your professional, quality look though! Bravo!
ReplyDeleteGreat tutorial. Lovely flowers.
ReplyDeleteWill be having a go.
Toni these are gorgeous, thanks so much for the tutorial, I will definitely be giving this a go xx
ReplyDeleteHi Toni, Thank you so much for such a easy to understand tutorial, I am sure loads of flowers will be blooming across desks everywhere thanks to this. Hugs Mo x
ReplyDeletetoni, these are beautiful--you can definitely count me in! And tell your boy he did a great job with the pics!
ReplyDelete:)
Oh Toni, these are gorgeous! Would love to win some of those!
ReplyDeleteHugs,
Roudi
Thanks for dropping by on my blog for the Craft Stamper hop! Your flower tutorial looks great - nice clear instructions and the finished flowers look fabulous, great to see something different made from those tattered floral dies that seem to get everywhere!
ReplyDeleteLove your flower tutorial! The flowers are beautiful!
ReplyDeleteTanya
phenis2031 at yahoo dot com
http://scrappylandusa.blogspot.com