Saturday, 9 February 2013

Love Me Do


I've been having a play with this MDF heart I bought the other week and have finished it just in time for the Fashionable Stamping Challenges 'Show Some Love' challenge, which is sponsored by the lovely people at Cottage Crafts. The original smooth  surface of the heart was in need of a little texturising, so I decided to firstly, give it a coat of paint and then a coat of crackle paint medium. I topped this with a further coat of paint and left it to dry I then rubbed in a little Walnut Stain Distress Ink, which has given it a rather nice wood-like texture. To continue the transformation, I used some Artist's Spackle, and Diane Reavley's leaf stencil. The lady was stamped on to white tissue paper before being collaged onto the surface. I then used the Spackle through a diamond pattern mask, around the image. I highlighted the leaves with some Treasure Gold paste and applied a little to the sides and edges of the heart, a few words and a bit more distressing and some pearls add the finishing touches.x


Wednesday, 6 February 2013

WOYWW #192 Must Tidy Up....... One Day !


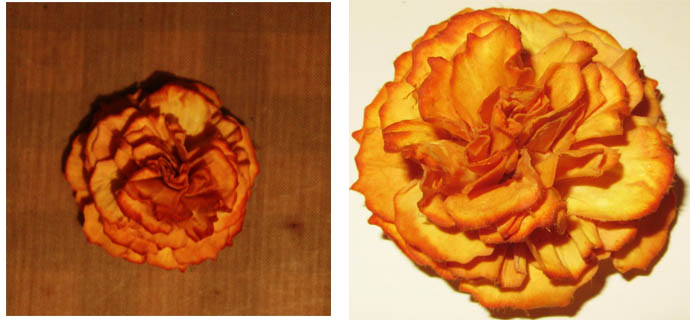
Better late than never! It's time for a Wednesday WOYWW post. What's that then? It's an opportunity to have a look at crafters' desks from all around the world. Pop over to Julia's Stamping Ground blog and get involved in the fun. Here's my table looking a bit like it looked last week with a few additions.  There's an MDF heart which has been gessoed ready for some altering. I found a great bargain shop called B&M Homestores. The heart cost £1.49, I bought a few other goodies as well all quite cheap. There are also one or two more flowers where I've been experimenting with different colours. The latest lot are a bit more grungey. Here's a picture of one of the crowded corners in my attic, just so that you can see how crammed with stuff the room is! Should I really be buying more stuff ? Hope you've all had a good WOYWW so far. See you next week.x

Sunday, 3 February 2013

'...and the Winner is....'


I promised to have a little giveaway following my paper flower step by step tutorial. I wrote all the names of the people who left a comment on my flower tutorial as well as those that commented on the flowers in my WOYWW post, on slips of paper and put them into my hat. As my son Max took the photos, I asked him to pick one out. I am pleased to announce that the very talented Butterfly is the name he drew out. Many thanks to all the people that left such lovely comments. I hope you'll join in when I have my next giveaway x

Thursday, 31 January 2013

Steam Punk Upcycled Box


This is a box I've recently finished that will house my creative journey projects for 2013. It's quite big so I can get plenty of tags and cards in there! It started life containing some yummy bath products that my brother bought me for Christmas. I was as excited about the box as I was for it's contents!
Here is the inside of the box, it is actually a rather nice plum colour, so I've only covered the inside of the lid where there was some writing.

Here is the original box before I covered it with embossed metal foil tape. It was very easy to cover with sticky backed strips of tape, which I ran through my Cuttlebug first, using Tim Holtz's Riveted Metal Texture Fades embossing folder. I placed a thin piece of card under each piece of tape before putting it through the machine. This stopped it from being too deeply embossed and prevented the foil from ripping when the backing paper was removed.
Once I'd completely covered the box, I applied alcohol inks in black, ginger and gold.
I then 'sanded' the surface with wire wool to remove some of the ink and reveal a kind of aged metal surface. This is fast becoming  one of my favourite techniques. The little handle was bought from a company called Sky Blue and Pink. I love it.
I cut out the cogs from thin copper using the Tim Holtz cogs die. I heated the copper with a cooks blow torch to age the surface. I then stuck these onto chip board cogs cut from the same die. The wings were from a set of 'Art Parts' I bought from the Artful Splodger when they were having a sale. They've been embossed with Stampendous frantage, sanded and distressed with Black Soot DI.
The corner pieces are grunge paper circles that have been given a rust treatment with Vintage photo distress embossing powder mixed with a little gold frantage. The studs around the edges are actually the tops off paper fasteners. I cut the butterfly bits off and stuck the heads on using a glue gun. I've really loved 'upcycling' this box and I'm sure I am going to enjoy using it. I am going to enter this into the Happy Daze ' Recycle it' challenge and also the Eclectic Paperie challenge which is 'Altered Boxes'. Just got word of another challenge I can enter my box into, it's the Frillie and Funkie 'Spruce it Up', I think that just about sums up what I've done with this. x

Wednesday, 30 January 2013

WOYWW #191 and a Spot of Shameless Self Promotion!


Good morning to all you desk snoopers, no I'm not being unkind, if you want to know why I'm saying this pop over to Julia's Stamping Ground blog and check out her wonderful WOYWW, or What's On Your Workdesk Wednesday and you too can have a snoop at other crafter's work spaces from all over the world. If you've found yourself here, have a nose at my desk, In the foreground you can see my new ipad stand bought for £1 at Walsall market!(much sturdier than it looks) and then scroll down to my flower making tutorial, you could be in with a chance of winning a selection of the flowers I have made, or have a go at making your own. They're easy to do and only take a few minutes. Happy WOYWW everyone.x

Step by Step Paper Flowers and a Bloomin' Giveaway!

Well as promised this is the step by step guide to making the paper flowers some of you saw on my desk last week. It's a bit long so you may want to grab a cuppa and get comfortable. So let's go!
You will need some fairly light weight card some punched or die cut flowers, water mister, distress inks of choice, a 'pokey tool', tweezers and some tiny brads. Each of the flowers I've made have 8 layers. For this tutorial I've used the 'middle sized' flower from Tim Holtz Tattered Florals die. You will also need a craft mat and a cutting mat, or similar surfaces.
Take eight flowers and use a blending tool to colour each one on both sides. Spray with water and leave for a couple of minutes so that the water absorbs into the card.
Then squash each flower shape between your fingers to form a sort of conical shape. slightly screwing each one up
Be careful not to rip the petals as the card will be fairly damp. Leave them for a couple of minutes for the creases to set. 
Now get your brads, pokey tool, tweezers and cutting mat at the ready. Gently open each flower shape and place one on top of the other rotating each layer so that they are not all in a uniform stack.
Using your pokey tool, make a hole through the middle of the layers, watch your fingers! hold the flowers together and secure with a small brad.
Now, using your tweezers, gather up the top layer of petals, and squeeze them together quite tightly. Repeat with each layer until you have what looks a bit like a flower bud.
At this stage, I like to mist the flower bud with a little water and gently dab across the edges of the petals with a little distress ink. once you get the hang of this you can experiment with the colours you use.
Finally, place your flower bud on your craft sheet and gently open each layer starting from the bottom and working your way up each layer. Leave the centre more tightly closed and the brad will not be visible. There you have it, a gorgeous vintage style flower. Leave it to dry thoroughly before using.
Hope you've enjoyed my first step by step, by way of a reward for those that have made it to the end of this post, leave a comment letting me know what you think and I will have a random draw on Sunday to win a selection of the flowers I have made. Thanks 'pinkaboo6691' whose video on youtube got me started and to my lovely son Max for his help with the photos x

Saturday, 26 January 2013

Her Journey.


Here is a large tag I've made using an image from one of my favourite but under used stamp sets. This rather beautiful lady is from The Stampsmith African American Heritage collection. I've stamped her in black Archival ink then tinted with Distress Markers and Distress ink pads. I then covered the image with Versa Mark ink and applied clear embossing powder. I bent the corners cracking the embossed surface, which has given it the look of an aged photo. The collection of  'ephemera' has been stamped with a variety of stamps from my collection. The train is from an Indigo Blue set. It's been stamped with black Archival and clear embossed. I've mounted it on dimensional pads to create a bit of depth. I think there are several stories that could be told with this tag, I'll leave it to the viewer to decide. I am going to enter this into both the Fashionable Stamping Challenges, 'Trains, Planes and Automobiles' and the Simon Says Stamp and Show, 'What are You Known For'. My work usually has  a vintage look with a bit of grunge and some colour thrown in for good measure. I love colour whether it's subtle or bright. I hope I've captured some of that in this piece. Oh and at work I'm known for my 'good' ideas. I hope some of that rubs off in my art ! x

Wednesday, 23 January 2013

WOYWW #190 Brrrrrrrr!


There's nothing we Brits' like better than to talk about the weather and boy, we've had a lot to talk about this week ! The first real snow we've had this year, has brought about the usual chaos. On the plus side, I've had an extra afternoon of crafty pursuits, the downside is that my crafty attic is very cold so I've been wearing umpteen layers of woollies, but the hands still get cold after a while. So what's this post about? it's Wednesday, so that means it's time for another What's on Your Wordesk Wednesday post. Go and have a look at Julia's Stamping Ground Blog and find out how you too, can show the world your crafty workspace. Believe it or not my work table is pretty tidy, I was forced to tidy up after I lost one of a pair of little chipboard wings I had been working on. I spent ages looking for it and of course, found it after I had used another one. So what else has been going on? I've made a few more blending tools to use with the Seasonal Distress Inks from last year. That's my growing collection  in the red tray, they are actually wooden drawer knobs with circles of Cut and Dry foam stuck to them.. I've also been really enjoying making some more paper flowers, I showed a couple last week but these are slightly different. I'm recruiting my son to help photograph a step by step, which hopefully I will post soon. Oh and there's my pink ATG, which you can blame Julia for, she said in her last WOYWW that they were on special offer on the Scotch website, I just had to.... well didn't I ? x

Wednesday, 16 January 2013

WOYWW #189 The Ever Decreasing Work Space !


Wednesday already? That means it's time for another Whats On Your Work desk Wednesday. If you don't yet know what that's all about, hop over to Julia's Stamping Ground Blog and you'll soon want to join in. I've still got a bit of space on my table this week, there's a label I've made for a project which is out of view at the moment. I hope to post that fairly soon so you can see what I've been up to. There's also a couple of paper flowers I made after watching a you tube tutorial the other night. There are loads of flower making videos out there using all sorts of materials, so if you're into making flowers and you've got some time to while away, I highly recommend taking a look. I've got this one bookmarked if anyone wants to know. Have a good crafty rest of week, those in the UK stay warm and safe, it seems like winter has finally arrived. x

Thursday, 10 January 2013

Twelve Tags of 2013 January


I'm so pleased that Mr Holtz is continuing with the Twelve tags Challenge this year. It's a great pleasure to join in each month and share his creative expertise. I love this first tag.What can be better for a fan of all things vintage, grunge and Steampunk, than a tag chock full of cogs, clocks and distress. add in one of may favourite quotes and I'm in 7th heaven. Thank you Tim for a great start to The Twelve Tags of 2013 .x

Wednesday, 9 January 2013

WOYWW #188 Good to be Back.


Well here I am, back after a brief absence from the fabulous 'What's on Your Work-desk Wednesday,' hosted by the lovely Julia over at her Stamping Ground blog. I've really missed not joining in for the last few weeks so it's good to be back. It's a great way of meeting and introducing yourself to fellow like minded crafters. This is my desk after a brief crafty session spent making my January tag for the Twelve Tags Challenge. There's the usual pile of Distress inks and a few embellishments. You may spy some rather interesting stamps which were free with a magazine. Who doesn't love free stamps, especially when they are this good. Now cast your eyes to the centre, what can you see? why a space of course, just about enough room for another session! Happy WOYWW everyone x

Tuesday, 8 January 2013

12 Tags of 2012 Finished.


Well here they are, my completed set of tags for the Tim Holtz 'Twelve Tags Of 2012 Challenge'. It has been a brilliant challenge and I've thoroughly enjoyed making each tag. The Great news is that Tim is going to continue the challenge for this year. If you didn't manage to join in last time, I recommend that you get on board for 2013.  It's great fun looking forward to each months tag and a great opportunity to learn new skills and use up some of the fabulous stash we crafters like to hoard! You don't have to have all of the supplies, the name of the game is creativity, so just put your thinking cap on and improvise. Hop over to Tim's blog where you can find the new January tag. It's gorgeous. x

Thursday, 3 January 2013

'Happy Birthday Tim' Studio L3 Final CC2 Challenge.


Happy New Year fellow bloggers ! Well this is my first post of 2013 and what fitting way to start the year than with a little tribute to Tim. Linda over at Studio L3, has done a fantastic job of hosting the Compendium of Curiosities Volume 2 challenges, which have taken us all on a fabulous creative journey through the book. She has never faltered in producing brilliant works of art, that have been a weekly inspiration and have made me want to dive head first into the book. THANK YOU Linda!
Now the final challenge is to make a birthday card for Tim using any of his techniques. I've gone back to basics with this card with some plain and simple stamp, emboss and distress. I've used the 3 gentlemen as it is one of the first Tim stamps I bought and is instantly recognisable as being one of the master's. I've also used my favourite 'sunray' stamp from the Tim Holtz Bitty Grunge Collection.  I've composed a little ditty for the inside, ok, ok, all you writers out there, I'm not a poet but I think you'll all know what I mean. I'd like to send this to Tim although coming from the UK it may be a little late. So thanks again to Linda and Happy Birthday Tim! x

PS. I almost forgot to mention that there are some totally fab prizes to be won supplied by Linda and Mario x

Sunday, 30 December 2012

Twelve Tags of 2012 Final Tags


Well here we are at the end of the Tim Holtz 12 Tags of 2012 Challenge and the final two tags. Both were, as usual, great fun to make. It's been a fantastic year long challenge and I am very happy that I've managed to complete each months tag. I've loved learning new techniques, improvising when I haven't had all the supplies and seeing all the fabulously creative work from the participants each month. The anticipation of each tag has added a little excitement to the start of each new month and the joy of seeing my name as a winner has been fantastic. So thank you Tim for all your efforts in hosting this brilliant challenge. Like many others, I'm looking forward to seeing what genius ideas you have in store for 2013.x

Saturday, 15 December 2012

Underneath the Mistletoe


It's time for The Fashionable Stamping Challenges #  To Die For. For this challenge, your project has to include a die cut. I've made this Christmassy tag using a branch of mistletoe which I've cut on my Pazzles Inspiration machine. The snow flakes were punched using a Woodware punch.  The tag in reality is much prettier than it appears here, just can't seem to have captured it. The challenge is as usual sponsored by the lovely people at  Cottage Crafts. I've used Tim Holtz's technique which he calls 'enamelled stamping' to create the background. The mistletoe has been inked with various distress inks and then dusted with the wonderful Ranger Dry Glitter, it's just like sugar! i'm also entering into The Simon Says Stamp and Show challenge which is to be inspired by Tim Holtz's 12 Tags from any year. I've chosen his technique from the September tag in 2011.

I would like to take this opportunity to express my sympathies for the people of America, after hearing of the terrible incident in Connecticut where many innocent lives have been lost. I cannot begin to imagine what the families and friends are going through at this very sad time. My thoughts are with you x

Thursday, 6 December 2012

Compendium of Curiosities Challenge # 31 Distress Palette


We are getting ever closer to the end of the Studio 3 Compendium of Curiosities Volume 2 challenges.
This week's subject is the third of Tim's ink palettes, this time using Distress inks. I love a bit of painting so it was very enjoyable to make this card. The stamp is one I bought at the NEC from Ali-Craft. It's by Lost Coast designs, (thankyou Netty x) I love it and can see it joining the ranks of my favourites. I cannot reveal the technique used out of courtesy to Tim, however you can find full details on page 51 of the Compendium of Curiosities Volume 2. There's still time to get your order in fore Christmas. Many thanks to Linda for hosting these brilliant challenges.x

Friday, 30 November 2012

Twelve Tags of 2012 November


Well once again at the 11th hour I've finished my tag for the Tim Holtz 12 tags of 2012 Challenge. The technique is to create a kind of 'faux batik' using clear embossing powder.Tim's tag is a beautiful Thanksgiving composition in Autumnal colours. I've decided to go with  the Summer Distress inks and a home made stamp, to make this 'peace' tag with a kind of early 1970's feel when we (those of us old enough to remember) aspired to the spreading of peace and love everywhere. The message is still as strong as ever.x


Wednesday, 28 November 2012

WOYWW #182


Better late than never, I think that is my motto! I just had to join in with the 182nd WOYWW and post this pic of my very good friend Sandy at my kitchen table. I've not been very well this week as I've had a sore throat. A late afternoon craft session has perked me up a treat. Sandy has been guiding me through the task of making a Christmas book using envelopes stuffed to the hilt with all sorts of tabs and tags. Sandy has supplied all of the papers and has done pretty much all the cutting. When it come to measuring and calculating Sandy is your gal. Thank you my dear friend x. You can see some of Sandy's lovely work over at her blog, Sandy's Piece of Heaven .  More pictures to follow later as the book develops. Many thanks to Gail at the Craft Barn for teaching the original project. If you don't know about WOYWW then hop over to Julia's Stamping Ground blog and get involved. x

Thursday, 22 November 2012

Compendium of Curiosities Challenge #29


Ok, Ok, late again! I just couldn't resist playing along with The Compendium of Curiosities Challenge with Linda over at Studio L3. This week's technique is 'texture fades', it can be found on page 64 of Tim's book. This little tag was inspired by a project I saw in this months Craft Stamper magazine by Helen Chilton. She has created some fabulous Christmas tags using die cut arched frames. For the background of this tag I've used a Cuttlebug embossing folder with that beautiful Craft Core card. the frame has been gessoed  and coloured with distress inks then stamped with black Archival ink. Well this is my first Christmas make and quite enjoyable it was too. x

Wednesday, 21 November 2012

WOYWW #181


Well here's my desk, those who know me will recognise the usually chaos with lots of stuff jostling for my attention. Why am I posting this? because it's Wednesday of course and time to join in with Julia at Stamping Ground's WOYWW, or What's on Your Workdesk Wednesday. I've had a lovely few crafty sessions this weekend, and this is the remaining mess with a few added extras. Instead of putting things away I've added to the pile by getting out some Christmas Stamps ready for some action later this week, I hope. i think I'll have to clear a space first though! I would like to use this post to wish all our American crafty friends a very happy Thanks Giving Day for tomorrow. Even when life seems pretty grim I think we can all find something to be thankful for. Happy WOYWW everyone. x

Sunday, 18 November 2012

Jumbo Fish Tag


The theme over at the Simon Says Stamp and Show this week is to stamp without ink, there is also a $50 gift token for one lucky person. Stamping without ink has given me the ideal opportunity to have a go with my newly acquired Indigo Blue, 'Flitter Glue' and gilding Flakes. I cut myself a big tag from cream card and sprayed it with some of the green shades of Dylusion inks. I then used a Japanese wave mask which I cut on my Pazzles Inspiration machine, and over sprayed with blue. I then stamped the fish with Flitter Glue and followed the instructions for adding the gilding flakes. Those flakes have a mind of their own ! the least bit of static and they fly up everywhere. I then stamped out the foliage again in flitter glue, but this time I used silver transfer foil. A little bit of walnut stain around the edges and Voila! Oh and there is also a bit of stamping with Pewter Distress stain with an Indigo Blue bubble stamp. The whole tag is very sparkly a lovely effect which unfortunately the camera has not captured. x

Saturday, 17 November 2012

All That Jazz


'Musical' is the theme of The Fashionable Stamping Challenges this fortnight. I'm pleased because it has enabled me to use one of my favourite stamps, this jazz band from Graphic 45. My brother is a jazz and blues musician as was my late father and we grew up with a lot of different types of music playing in our house, so music has always been an important part of my life. I love this band, it looks so joyous. Each time I use this stamp I feel compelled to place it on a vibrant background to reflect the joys of making music. The background stamps are from a Tim Holtz collection. I've also used his technique of enamelled stamping, though I'm not sure it shows up so well in this photo. As usual the challenge is sponsored by the lovely people over at Cottage Crafts.x

Thursday, 15 November 2012

Compendium of Curiosities Challenge #28 Reflections Stamping


This weeks technique for Linda's  Compendium of Curiosities Challenge is 'reflections stamping'. Tim demonstrates a couple of different ways of using the reflections stamps on page 65 of his book. The challenge this week is sponsored by Simon Says Stamp to the tune of a $25 gift token. I was quite excited when I saw this weeks challenge, as I was keen to carry out an idea I had a while ago. Last year I was lucky enough to have an article published in the Craft Stamper magazine about stamping onto transfer paper. At the time I had really wanted to use some text but knew I couldn't do this with direct stamping. When I later discovered Tim's reflections stamps I knew they would be ideal for this method. My project for this week is a calico tote bag decorated with brayered and stamped transfer paper.


Here are some pictures showing the three stages of stamping onto the transfer paper. I've really enjoyed making this and am looking forward to using the reflections stamps more often.


I've used Archival ink and VersaMagic chalk inks. If like me you keep all your Craft Stamper magazines you can find my original article in the January 2011 issue. x

Wednesday, 14 November 2012

WOYWW # 180


Well it's been a few weeks since my last WOYWW post! I don't know why but Wednesday seems to have become my busiest day, so in an effort to overturn this I'm joining the lovely Julia over at her Stamping Ground blog for a quick post on what crafty things have been going on in my attic. My table is the usual higgledy piggledy mess, with a postage size area for actually working on. You may spy a couple of cards which I finished in a crafty session yesterday evening. They feature a stamp from a set I bought in a Madrid art gallery, see, my recent short break wasn't all eating and drinking! I've had a big craft spend recently after going to the NEC last Friday. You can see some of the evidence in the shape of theelusive white Sharpie. I've being dying to get my hands on one of thses for ages and now I've got 2! so hopefully I'll be getting down to some serious crafting soooon. Happy WOYWW everybody, it's good to be back x

Thursday, 8 November 2012

Alcohol Inks and Acetate


It's time for another Studio L3 post. It's challenge number 27 and we're on the home straight, too sad! Linda has done a fantastic job of hosting Tim Holtz's Compendium of Curiosities Volume 2 challenges. This week's technique can be found on page 52. It's a great chance to get out those fabulous alcohol inks. I've plumped for something pretty and feminine and made a little note book featuring a lovely Crafty Individuals Stamp, CI-132, which has been stamped on acetate and coloured with alcohol inks. Full details on how to do this can be found in the book. Not got it yet? well Christmas is definitely coming so hop over to Tim's blog and get that copy on order cos you'll love it! x


Thursday, 1 November 2012

Still on the Dark Side


Another late post for Studio L3 Compendium of Curiosities Volume 2. It's time for challenge number 26 using Tim's Crumpled Kraft Suede technique. For full details, turn to page 40 of CC2. I'm still in halloween mode and have made a rather 'dark' valentine card as I was keen to use this heart stamp I bought sometime ago from Stampfrancisco. They have some really quirky stamp designs. I don't think this is quite finished  as I feel the flower isn't quite working for me. I may have to come back to it... or not as the case may be I think I am done with Halloween now. Still I really wanted to enter Linda's challenge as I missed the last one. This week's challenge is sponsored by the lovely people over at The Funkie Junkie Boutique with a $25 gift certificate. I am also entering this into The Fashionable Stamping Challenges where the theme is Halloween. They also have kind sponsor in  Marina at Cottage Crafts x.