Thursday, 4 June 2015

Small is Beautiful ~ Stamps and Stencils ~ New Challenge


It's time for a new challenge over at Stamps and Stencils. We've really enjoyed seeing all the entries for last month's 'Three of a Kind' challenge and I for one, can't wait to see what you come up with this time around. Julia is our host this month and this is what she has to say......

For this month's challenge you are asked to make or alter something small.This could be a tiny book or journal, an ATC or ATB, a small canvas or box/tin of similar size, a small piece of jewelry - anything, as long as it is small. you must use at least one stamp and one stencil on your project. Please remember we are a mixed media challenge blog and the style of your work should reflect this.

My project consists of these two mini canvasses decorated in a Steam punk style. Each canvas measures around 70 mm square or 2 3/4 inches. It's strange, but I find that a small surface can be almost as daunting as a large canvas ! 
My starting point for each canvas was to partially cover the surface with book pages. I then stamped the images onto a piece of Deli Paper and adhered them to the surface with matte Glue and Seal. I usually use tissue paper for this technique, but my dear friend Sandy, brought me a box of Deli Paper back from her trip to New York and I was keen to try it out. So far so good ! It's more robust than tissue so it's much easier to handle.
I used Distress Markers and a water brush, to add a little colour to the face, I then set too with embellishing, using some watch parts that I've been hoarding for a long time ! The stamps I've used on each canvas are by La Blanche. I have amassed  a pretty big collection of  stamps and it's been great to get out some of the ones I love but haven't used enough !
Here's number 2. The stenciling has been done with Wendy Vecchi's Crackle Embossing Paste through a Tim Holtz' Typography Layering Stencil. I decided to add some faux gold leaf onto the surface of the letters, 'cause I love a bit of bling ! I couldn't resist adding some coiled rusty wire to create a little hanger.
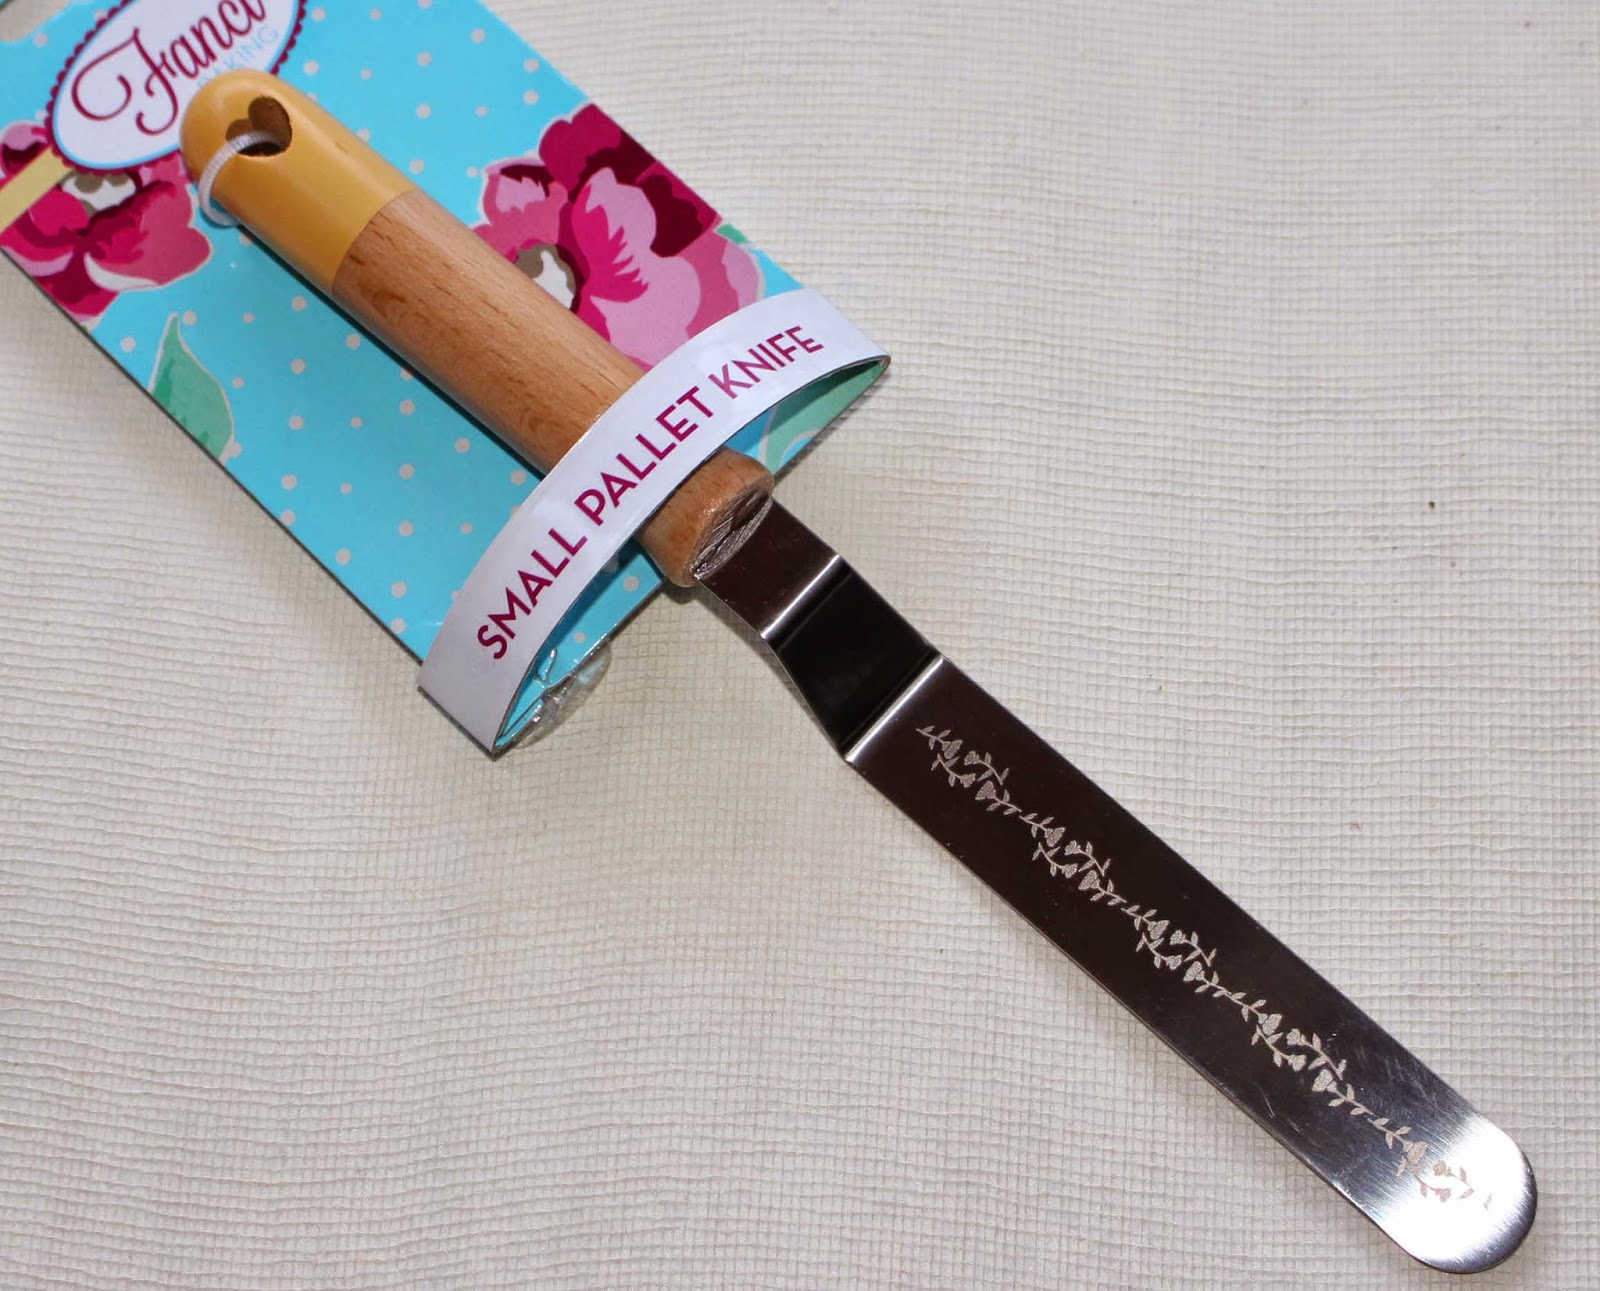
So now it's over to you ! hop over to the Stamps and Stencils blog where you'll find some fantastic inspiration from Julia the rest of the design team. Don't forget to take a look at the blog next Tuesday where the winners of the last challenge will be announced. I shall also be using 'Mr Random Organiser', to select a winning entry for the palette knife. I will post the name both here and on the Stamps and Stencils blog. So, until next time... happy crafting ! x

Sunday, 31 May 2015

Twelve Tags of 2015 ~ May

Phew ! last day of the month and I've just managed to finish my tag for Tim's Twelve Tags of 2015 Challenge. I love all the different elements Tim has used on this month's tag, you can see his fabulous piece by following this link. I've followed his design quite closely and just substituted a few things for those products that I've yet to acquire. I was very happy to get my hands on the  Sizzix Tiny Tattered Florals dies, from the lovely folks at Craft Obsessions. Once I started quilling these gorgeous little flowers, I couldn't stop ! I've now got a whole bunch of them waiting for future projects. Once again another month has flown by and it's hard to believe that tomorrow, we will be half way through the year Eeeeeek ! Many thanks to Tim for another great tag  x

Thursday, 7 May 2015

Three of a Kind ~ Stamps and Stencils ~ New Challenge.

It's time for our 2nd  challenge over at Stamps and Stencils but before I tell you more about this, I'd like to just thank every single person who took the time to upload a project for our 'Any Thing Goes' challenge and helped to make the launch of Stamps and Stencils, such a resounding success ! We had a whopping 135 entries. Make sure you tune in next Tuesday to see our winners post.

Ruth is our host this month and she has chosen 'Three of a Kind'. This is what Ruth has to say about the challenge......

'What we'd like to see is 3 of the same sort of focal element on a project so we don't just mean 3 buttons or small embellishments, it could be 3 flowers, 3 figures, 3 inspirational quotes....or thinking wider, if you're feeling adventurous you could do 3 ATC's, a trio of ATB's or maybe a triptych.'
  
I think you'll agree there's plenty of scope there ! So please, let your imagination run wild and show us your 'Three of a kind'. You can see Ruth's fabulous project as well as plenty of luscious inspiration from the rest of the design team over on the Stamps and Stencils blog

I've put together this mixed media panel, utilizing a piece of corrugated card as my substrate. I've used embossing paste through stencils by Tim Holtz and Creative Expressions, in the background......
I added more texture by sprinkling Creative Expressions Micro Beads onto matte gel.
Really love this technique ! Once everything was dry, I painted the surface with Distress Paint in a mixture of Antique Linen and Frayed Burlap. I then used Vintage Photo Spray to add 'depth' to the stenciling and after more drying time, I highlighted the stenciling and glass beads with Treasure Gold Paste in Spanish Topaz, Aquamarine and White Fire.
The three hearts are made of card, with embossed foil wings. The surfaces have been treated with Wendy Vecchi's Faux Granite Ware technique. This is great fun to do and if you haven't already tried it., you can find full details on Wendy's blog with this link A few embellishments, some faux rust finished cogs and a doodle of rusty wire around the edge, complete the panel.
Now, as a little treat for one lucky person, I will be giving away this handy little palette knife for one of the entries, chosen at random, for this month's Three of a Kind Challenge. I discovered these in my local Debenhams store. They're actually used for decorating cakes, but I've found mine to be the perfect tool for applying a layer of 'streak free' embossing paste. The winner will be announced both here and on the Stamps and Stencils blog, at the end of the challenge. 
All that remains is for you to go and get crafting and share your 'Three of a Kind' projects with us over at Stamps and Stencils. You'll find full details and the challenge rules over on the blog. Happy Days everyone ! x

Sunday, 19 April 2015

Twelve Tags of 2015 ~ April

Ha ha ! It's only April 19th and I'm posting my Tim Tag for his Twelve Tags of 2015 Challenge. This is positively early for me! This was yet another fun tag to make, I'm really not sure how Tim keeps coming up with these unique ideas every month. Although I've stuck closely to Tim's original tag, which you can see here, I had to do a fair bit of improvising and that was great because I was able to use my stuff ! Firstly I cut the tag using Kraft card and my Tag and Book Plate die. I haven't got the lovely Adventures Word Blocks dies, but I have got the Holiday Words block dies from last Christmas. There were actually several words I could have used from this set but I decided on using the word 'Earth'. Luckily for me I have got Tim's beautiful Flower Garden stamps. I went for a vintage look by stamping on some rust spots using a stamp from my 'most inked set' of Bitty Grunge stamps. I used my Pazzles machine to die cut the word 'beautiful' and just as I was threading the dyed seam binding through the tag, I glanced down on my rather messy craft table and in a little container of bits and bobs, I noticed a Dymo label with the word 'Mother' on it. The perfect finishing touch, 'Beautiful Mother Earth' Too right ! Thanks Tim, with this tag I feel that I've made the 'most out of my products' x

Thursday, 9 April 2015

Just a Peek !

Hi everybody I have a new post over on the Stamps and Stencils blog today. As part of what we want to do on the new challenge blog, the design team will be taking it in turns to share what we are calling an 'Inspirational Post'. These posts may be about a specific technique, a product or maybe just a project one of us would like to share with you all. We are absolutely thrilled by the response we have had to the Stamps and Stencils first challenge, there are so many fabulous entries and we are not even half way through the month! Thank you all so very much .
Now,  here's a sneaky peek from the first of our Inspirational Posts, which I am honoured to present to you today. I hope you'll find some time to hop over to the blog and take a look. I should grab a cuppa and a comfy seat first though ! x

Thursday, 2 April 2015

Stamps and Stencils ~ Launch day ~ Anything Goes!

Greetings everybody ! The day has finally arrived for the Launch of our new Stamps and Stencils challenge blog.We have the very lovely and talented Sue Carrington to thank for for taking the initiative in coming up with the idea and  putting the blog together. I certainly hope you'll hop over and take a look. We are a monthly, mixed media challenge blog and as the name suggests, we are all about Stamps and Stencils. I think you'll agree these are staples in any crafter's toolkit.  Our first challenge is an 'Anything Goes' and we would love to see what you come up with using stamps, stencils or both ! There's some fabulous inspiration over on the new blog, which you can easily find with this link.
For my contribution, I've made a mixed media canvas with lots of yummy Distress Paint and stencilled embossing paste. I was very fortunate to visit Marrakesh last year and brought back some lovely vintage style postcards which I've been saving to use in a project. As I was going through my stencils, I found one that was perfect for a Moroccan styled piece. I used the fabulous embossing paste technique used by Tim Holtz on his March tag to create the background for this beautiful group of musicians.
As with most of the canvasses I make, I covered the background with various book pages, I think it's psychological, getting rid of the blank space! I then painted on some vibrant Distress Paint colours and allowed the colours to marble together, with a little help from a water spray. The new colours that Tim has introduced are exactly the colours you see everywhere in Marrakesh. Many of the buildings are the colour of Abandoned Coral, with paint work in Mermaid Lagoon and Cracked Psitachio, Quite uncanny, I wonder if Tim's been over there, Ha ha !
I used one of Tim's Damask stamps, with Archival ink and stamped onto a tissue.
I applied this to the canvas using lots of Matte Glue and Seal. I also applied embossing paste through the stencil and while the paste was still wet, heat embossed with gold and blue embossing powder. and heated to activate. I just love the effect this gives!
To make the damask patterns stand out a little more, I doodled around them with a gold pen. I also added some stamping with a French script stamp. Instead of using the original postcard, I scanned it to my computer and printed it to a size which just fitted inside the oval shape I'd already die cut in an embossed Cameo Frame, which had been in my 'unfinished stash'. I find that it's always worth looking through my unfinished  stash  when I'm  piecing something together, I often find something that's just right. After mounting the framed picture on dimensional pads, I used a Stabilo black pencil and water brush to add a little shadow underneath the frame. It just adds a little bit of depth. The flower are Ideaology metal ones which, i painted with Distress Paints, I love that faux enamel look.
So there you have it! my first post for the new Stamps and Stencils blog, I hope you've enjoyed it. I look forward to seeing you over there. Come on! dust off those Stamps and Stencils and let us see your fabulous creations ! Full details of how to join in are over on the Stamps and Stencils blog. x

Monday, 30 March 2015

Exciting News ~ I'm Dusting Off My ~ Stamps and Stencils !

I'm back again to share some exciting news! I'm very pleased to announce that I am going to be joining the design team of a brand  new challenge blog called 'Stamps and Stencils'. The blog will host monthly, mixed media challenges, with a focus on using stamps and stencils. To help to get your creative juices flowing, we will also feature inspirational posts throughout the month. There's a fantastically talented design team, just revving up for the launch of our first challenge on Thursday 2nd of April. So if you're ready to have some creative fun, dust off those Stamps and Stencils and come and join us. You can meet the design team by following this link to the Stamps and Stencils blog and don't forget to tune in on Thursday for details of our inaugural challenge. Looking forward to seeing you there ! x
Hi everybody! It's been a little quiet here at 'craft dabbler central' as I've been pretty busy with my day job. Happily, I've now broken up for the Easter holidays and  could think of no better way of kick starting some crafty-ness, as to getting on with my offering for Tim's Twelve Tags of 2015, March tag. You can see Tim's gorgeous tag here. As usual it's been great fun to make. I love the embossed gold stencilling against the colourful, Distress Paint background. I'm sure I will be revisiting this technique very soon ! I was a bit disappointed not to have used the Typo Layering Stencil. Mine is currently sitting in the post office awaiting collection! Still, I do love the way the Gothic one has turned out, Thanks once again Tim for sharing your creativity, looking forward to seeing where this takes us all next month ! x

Thursday, 5 March 2015

Springtime ~ Artist Trading Post Exchange ~ New Challenge.

Well there has been a definite touch of Spring in the air here in the West Midlands, with crisp blue skies, birds singing and even a touch of sunshine. All this has helped to inspire me to get stuck into our latest challenge over at the Artist trading Post Exchange. Annie is our host this week and she has chosen the theme of Springtime. You can see Annie's amazing project over on the blog, by following this link. I'm sure you'll also be impressed by the work from the rest of the design time.
I wanted to try something a little different from my usual grungy style and this canvas is the result. It's about as clean and simple as it gets around here ! I started with a 5"x 7" canvas and gave it a coat of white gesso. Even though these little canvasses are already gessoed, I like to put on another coat as it kind of softens the texture of the woven canvas.While this was drying, I worked out a design in my art journal. I could 'see' it  in my head but wasn't entirely sure if it would work !
This is what it looked like.
 Once I was happy, I stenciled the splats onto my canvas, using Barn Door, Mustard Seed and the new Cracked Pistachio Distress Paints.
I used Tim Holtz's 'Splatters' Layering Stencil to create the splats. This is the first time I've used this stencil and I must say I just love those splats! I then turned my attention to the stamping. Stamping directly onto canvas is very different from stamping into a journal. It creates a much softer image than I wanted for this project. For this reason, I decided to stamp onto a tissue and apply it to the canvas. I used a 'mansize' two ply tissue, and separated the top layer after it was stamped.
The stamps I've used are from a set called 'Live, Laugh, Love' by Indigo Blu. In this picture you can see how I've used a 'post it' paper mask, to enable me to build up the scene. I keep all the masks I make, as it is a bit tedious having to cut around the intricate shapes of my stamps. I've got quite a collection now, as I really like this technique of creating layers. As I'd already had a dry run of the stamping in my journal, it was easy to re-create the design on the tissue. I used black Archival Ink as this is waterproof and essential for the next stage.
Here is the finished stamping on the tissue. I then coated the surface of the canvas with Matte Glue 'n' Seal. I carefully separated the layers of tissue and gently applied the stamped layer to the canvas.  It is possible to rip around the stamping and apply it a piece at at a time, but I was feeling brave so I did it in  a 'one-er' ha ha! I used a thick soft paint brush with a kind of tapping motion to secure the tissue to the canvas. It's important not to over work it at this stage as the tissue is quite fragile once it comes into contact with the Glue'n'Seal. Once the canvas was dry, I gave it another coat of Glue 'n' Seal and left it to dry once more. I then replaced all the paper masks and added a few more splatters using watered down Distress Paint and a paint brush to flick the paint on, I hope my blog friend Buttons, will be proud of me, as this is a technique I know she loves ! My final addition to the canvas was to add the sentiment, this was stamped on tissue and applied in the same way.The stamp is from one of the new sets by Tim Holtz called 'Perspective'.

So that's it ! I hope I haven't bombarded you with too much information ! We would love you to join us for what is, I'm sad to say, going to be our last challenge as the Artist trading Post Exchange. You have until the 18th of March to upload your Springtime projects. Please remember to include some stamping and you may be lucky enough to win a £10 voucher for the Artist Trading Post shop. I'd also like to take this opportunity to thank The Artist Trading Post for their generous support of the ATP Exchange, I know many of you have really enjoyed hopping over to visit and joining in with the challenges.

Now !!!!!! We would like you all to watch this space........ you can't keep a good team down, so keep your eyes peeled for our next exciting adventure................can't wait ! see you soon x

Saturday, 28 February 2015

Twelve Tags of 2015 ~ February

Happy last day of February everyone! At last I've managed to finish my tag for Tim's Twelve Tags of 2015 challenge. It's been sitting on my table all week and I thought it was about time I set to and finished it  off. I've stuck fairly closely to Tim's design as it gave me the opportunity to use some of my new goodies. I love the little flashcards and I'm  sure they will be getting a lot of use. You can see Tim's wonderful tag here. Remember it's never too late to join this great challenge. if you're a fan of all things Tim Holtz, making a tag each month is a great way of getting to grips with techniques and products old and new. It's always great to see all the different interpretations and imaginative product substitutions. There's an awful lot of creative people out there !!! Thanks for your continued efforts to inspire the world Tim ! looking forward to tuning in tomorrow x

Thursday, 19 February 2015

Alphabet Soup ~ Artist Trading Post Exchange ~ New challenge.

It's time for a new challenge over at The Artist trading Post Exchange. Ruth is the hostess with the mostest and she has chosen 'Alphabet Soup' as the challenge theme. If you hope over to the ATP Exchange blog you can see her gorgeous piece, as well as some fabulous makes from the rest of the design team. My contribution is a tag, I've made using Tim Holtz's Typograhy stamp set with an Alcohol Ink background. I love all the mixed media products available at the moment but every now and again it's nice to get down to some good old, straightforward, ink and stamping !
I started off with a manila tag and swiped some Distress Stains onto the surface. I then took a piece of glossy card stock and applied several colours of Alchohol Ink with a blending tool. I used Mushroom, Peach Bellini, Willow, Juniper and Gold Mixative. Once the surface was covered I added a few droplets of Blending Solution which moves the ink around and creates bubble-like patterns. If you haven't tried this before, you really must, it's such fun !
I cut a piece of the Inked card to the size I needed for my tag, and stamped over the surface with the alphabet script from the Typograhy Set. I used Jet Black Archival Ink and heat embossed, with clear embossing powder.  You can see the embossed script in this picture, you may however, have notoiced that its not black but more copper coloured. This was one of those great mistakes that lead you to new discoveries ! I was rubbing a little  Spanish Topaz Treasure Gold around the edges of the tag and accidentally rubbed over some of the letters, I loved how the raised embossing looked and decided to cover the rest of the letters, by just lightly rubbing the surface with Treasure Gold paste using  my finger. Result!
I stamped the hand onto a piece of water colour paper and used Distress Markers and a Water Brush, to lightly colour the surface. I then cut it out and mounted it on a couple of raised foam pads.
I stamped the ink bottle with Jet black Archival Ink, onto a left over piece of the Glossy Card Stock. This gave a nice contrasting texture behind the hand. I adhered several layers of foam pads down the centre of the ink bottle and double sided adhesive along the sides, this helped me to shape the bottle and add dimension.
I adhered some cogs to the side so as to add a little more texture and completed the tag with a stamped label and a border from Tim's Industrious Sticker range.
Now it's your turn ! We would love to see your creations for our Alphabet Soup challenge. There is a £10 product voucher from our fabulous sponsor, The Artist Trading Post, for one lucky winner. We also have a lot of fun choosing our top three entries. All you have to do is create a project based on the theme, remember to include stamping somewhere on your project, then upload your entry to the ATP Exchange blog. Simple ! So why not hop over to the blog, take some inspiration from the design team and get crafting ! If you wish to purchase any of the products I've used, click on the highlighted links and you'll be transported straight to the Artist Trading Post shop.  Happy Creating ! x

Thursday, 5 February 2015

Love is in the Air ~ New Challenge at The Artist Trading Post Exchange

Hi everybody! there's a new challenge over at The Artist Trading Post Exchange, chosen by the very talented Yvonne and it's 'Love is in The Air'. Ha ha! a very popular theme at this time of year, so we hope to see plenty of your creations ! The challenge lasts for two weeks and if you hop over to the ATP blog you'll  see Yvonne's gorgeous work as well as plenty of inspiration from the rest of the DT. We are a mixed media challenge and all we ask is that you to include some stamping on your entry. That will also make you eligible to win a fabulous £10 voucher for The Artist Trading Post and with all the new goodies starting to arrive, how can you resist!
I've made this shabby chic wall hanging, with a nod to that wonderful city of romance, Paris. I've only visited Paris once, and that was a very long time ago, I'd love to go there again.....one day!
The base of my hanging is a piece of corrugated card. I firstly painted it with White Gesso, and added some Studio 490 Crackled Texture Paste through a Tim Holtz Gothic Layering Stencil. once this was all dry, love those fine crackles ! I painted it with Vintage Lace Fresco Finish Paint and left it to dry. I then embossed a piece of card, to which I had applied some foil tape. I've got a roll of plumbers' aluminium foil tape which I've been working my way through.
I used one of the Sizzix Book Covers embossing folder to add some texture and painted it with Victorian Velvet Distress Paint, I then die cut the little Movers and Shapers cherub and hearts from manilla card and used a piece of left over foiled card to cut and emboss the Eifel Tower.
As you can see, I painted the cherub and hearts. I added Clear Rock Candy Stickles Distress Glitter to the surface of these which I had coloured with alcohol ink. I used Cloudy Blue for the Cherub and Shell Pink for two of the hearts. Once all the elements were prepared, I started to assemble the pieces.
I lightly sanded the embossed foil and cut out the centre oval shape. I stamped a piece of card with the lovely French script stamp from the Stampers Anonymous Papillon Set . I used Watering Can Archival Ink. for the stamping.
I added a die cut frame which I had firstly painted with Brushed Pewter Distress Paint.  A bit of distressing here and there completed the background. I then adhered the embellishments with dimensional tape.
I applied some silver embossing powder to the edges of the card, and heat embossed.
 As a final touch I added die cut letters to the centre to spell the word 'love'. I think I am turning into a bit of a romantic in my old age ! I hope you'll find time to embrace your romantic side and share a  project with us, we'd love to see your interpretations because there is definitely a lot of 'Love in the Air' out there in blog land ! x
If you'd like to purchase any of the products I've used from The Artist Trading Post, Just click on the highlighted links and you'll be transported straight there .

Monday, 2 February 2015

Guest Creative Guide for A Vintage Journey ~ 'Love is in The Air'

'A flower cannot blossom without sunshine
And a man cannot live without love'
I'm delighted to have been invited to be a Guest Creative Guide by the wonderful team over at A Vintage Journey. I feel truly honoured for my project to be featured on the AVJ blog, alongside the work of so many of my favourite designers.
Astrid is the host of the current challenge and she has chosen to go with a seasonal theme, 'Love is in the Air'. You can see her gorgeous tag book, as well as the rest of the design team's gorgeous projects here,  http://www.vintagejourney.com/2015/01welcome-toni-a-guest-creative-guide.html
Regular visitors to A Vintage Journey, will know that this challenge blog celebrates all things 'Tim Holtz'. In keeping with this ethos, I've altered  a little paper mache box, which is in the shape of a book. I've used some of my most favourite 'Tim' products and techniques in the process.
It measures around 8 x 11 cm, so is quite small. I covered the outside with gold embossed black tissue paper. This is a technique I just love, it creates a really luxurious surface and it's very easy to do! Just stamp your image with Versa Mark ink, cover with gold embossing powder, apply heat and watch the magic work!
I made two pieces of embossed tissue and adhered one to the front and one to the back of the book. I then ripped a strip of black cotton fabric, and adhered this to the spine of the book, overlapping the covers by about 1cm. I used Ranger Matte Glue n' Seal for adhering both the tissue paper and fabric. The fabric has given the spine of the book a really authentic look and has worked much better than I'd anticipated. I used Helmar 450 Quick adhesive to secure some metal numbers to finish off the spine.
I painted the inside of the 'book' with red acrylic paint and adhered a stamped sentiment on one side.
In order to glitz up the inside, I covered  the base with Glossy accents and sprinkled on Clear Rock Candy Distress Glitter, which I had firstly coloured with Red Pepper Alcohol Ink.It's lovely and sparkly!
Prior to decorating my 'book', I spent an enjoyable evening making over a dozen red roses. Red roses are such a traditional expression of romance, that I really wanted to include them in my project.
Here are some of them drying, after being painted with crimson acrylic paint. To make the flowers, I used Tim's Tattered Pine Cone die, and followed his instruction, which he showcased on his Twelve Tags of 2014, April tag. You can see the tag and a video of how to make the flowers, by following this link. Once my flowers were dry, I gave them a light spritz with Perfect Pearls, Heirloom Gold spray. I then adhered a dozen roses inside my book box, in order to create a bed of roses for it's resident.....
...and here she is, 'Love', a little 'Frozen Charlotte' from Tim's Ideaology, Fractured Dolls. This is the larger one of the pair. I gave her a pair of die cut wings, which I painted gold and added a crackle finish to. I used a Remnant Rub On, to add the word 'Love' across her heart. I then adhered her to the base with several layers of dimensional tape, stacked together. She nestles into the box quite snugly. To finish off my book box, I painted the sides with Tarnished Brass Distress Paint. I then added an Ornate Plate and some metal filigree corners to the front cover. I also adhered a few gems here and there. The sentiment was constructed by re-figuring some Remnant Rub Ons to  the words 'lives' and 'here'. More roses, some greenery and of course some dyed seam binding were the final touches. 
I had a really good time creating this piece and I'd like to thank Brenda and the rest of the team for inviting me to be a Guest Creative Guide. I hope you will hop over to A Vintage Journey, where you can read a little bit about me and see the fabulous work by the resident AVJ design team. Many thanks everybody x
http://www.vintagejourney.com/2015/01welcome-toni-a-guest-creative-guide.html 

Friday, 30 January 2015

Compendium of Curiosities 3 ~ Challenge 20~ Distress Water Colour ~ Part 2

Hi everybody! It's been a few weeks since I've joined in the fabulous Compendium of Curiosities Volume 3 Challenge, so I thought I'd better get my finger out and get on it! Linda and the Curiosity Crew are on challenge 20 already and like many people, I really don't want it to end!
The Crew have chosen the technique of 'Distress Water Colour part 2'. This can be found on page 40 of Tim's Compendium of Curiosities Volume 3. If you want to know how to water colour like Tim, you'll have to grab a copy of his book, which you can order directly from the master, by following this link. This fortnight's challenge is sponsored by by The Funkie Junkie Boutique, to the tune of a fabulous  $25 gift certificate for one randomly drawn entry. There is also a box of assorted goodies, donated by Tim and Mario, for the Curiosity Crew's favourite.
I've made this little triptych with some stamps I received for free in a goody bag. I love these vintage images. Here are a couple of close ups

Well there you have it ! Challenge #20 completed. I hope I'll be back to join in with #21. happy crafting everyone 1 x